When adding a Subscription Policy it is important to remember that each rule of the subscription policy has different conditions and options for you to control. these can be combined to suit your requirements.
via Website
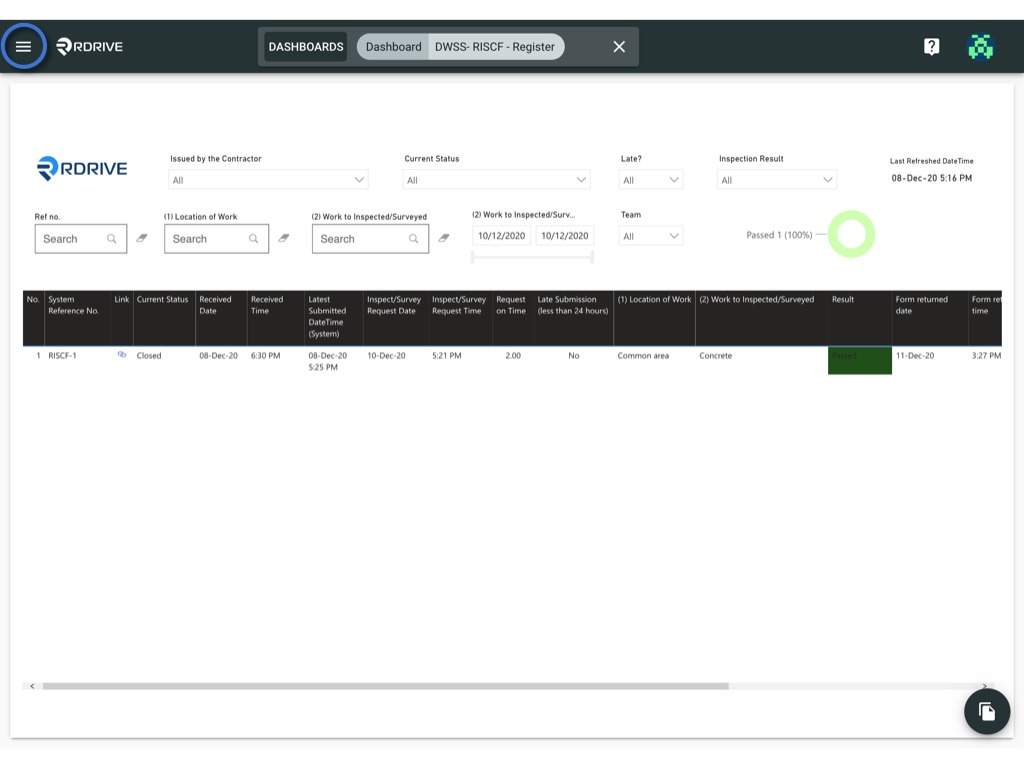
Simply press the Menu icon ≡ in the top left corner of your screen to unfold the Menu and gain access to the Subscriptions page within the Settings drop-down as shown below.

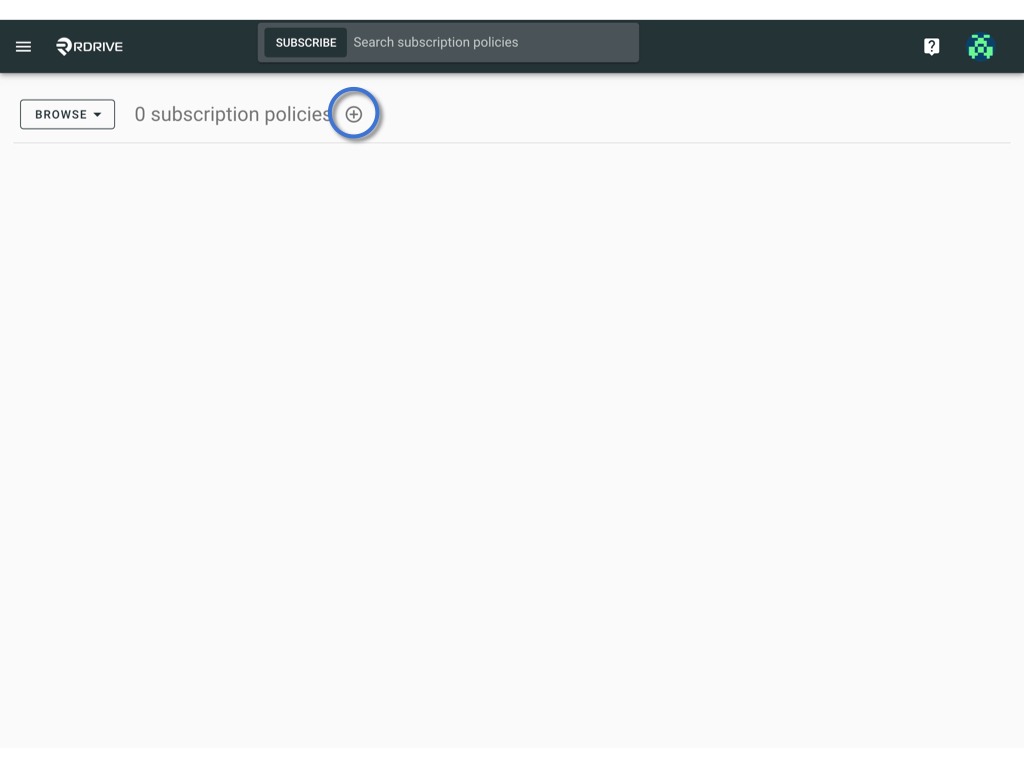
Press + button circled below to add the subscription policy.
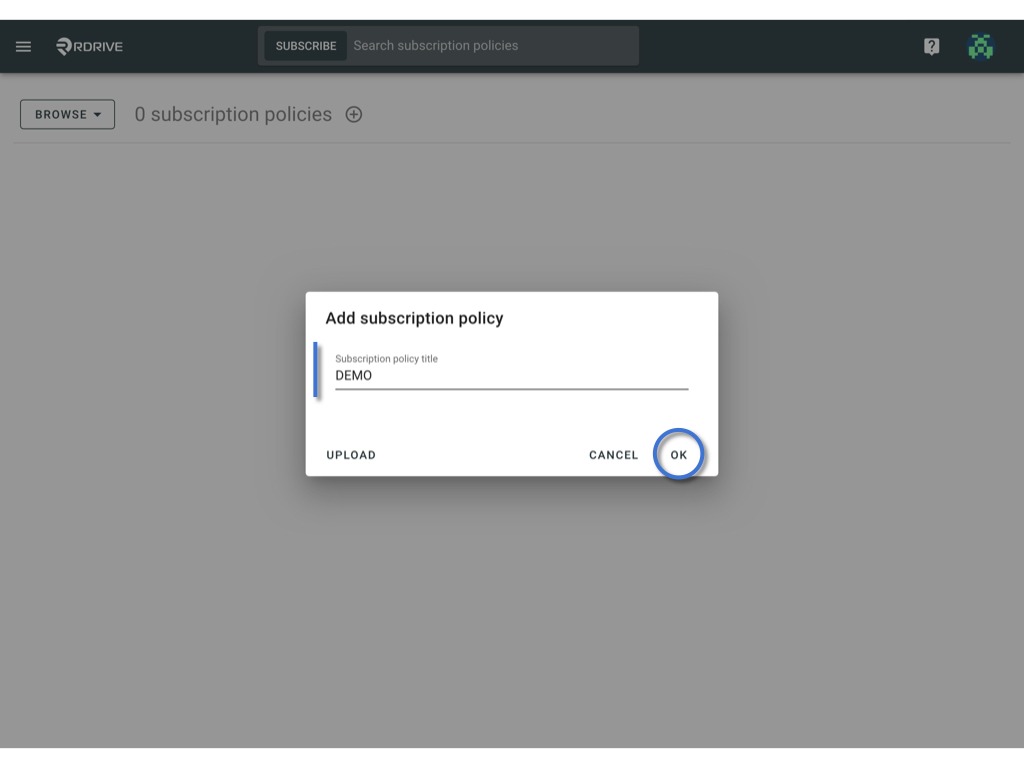
Enter the subscription policy title and click "OK" to confirm.
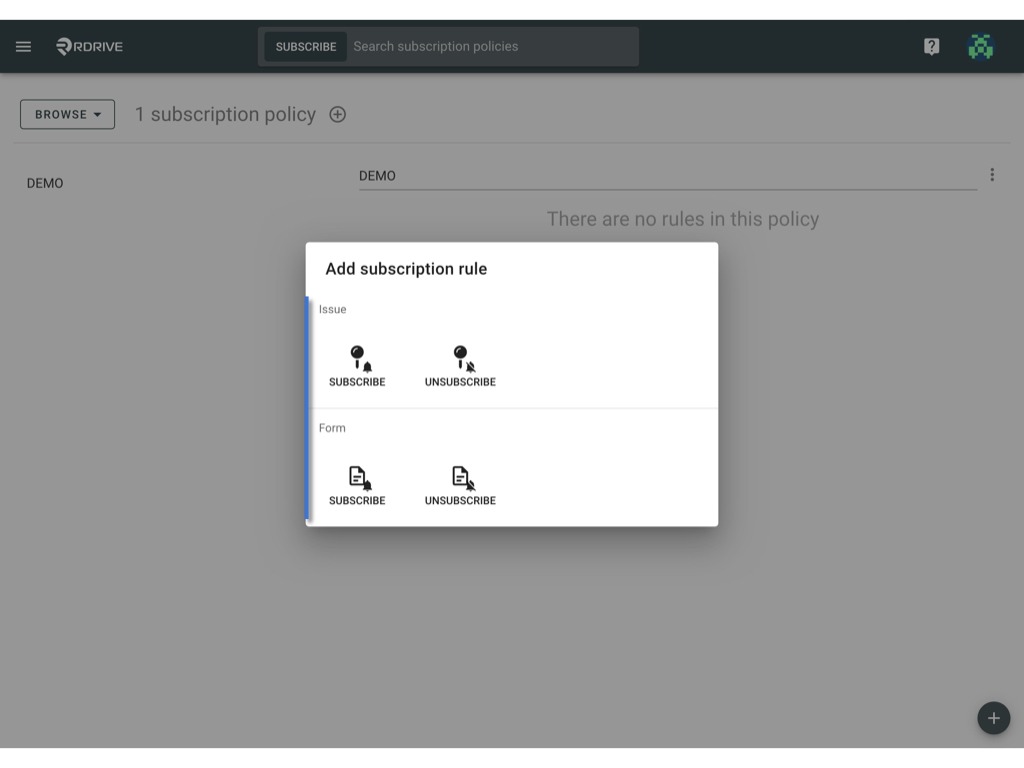
The next thing to do is to press the + button on the bottom right-hand corner of your screen to add rule(s).
The subscription policy rule window will appear in the centre of your screen. here you will need to select whether your subscription policy is in regard to any issues/defects/records or processes/checklists as applicable as shown below.

You can choose when the subscription notification is sent out via the "When" option as shown below, this will determine the notifications being sent and at what stage. Selecting "Issue is under control" will prompt notifications to be sent out at every stage of the issue/defect/record or process/checklist dependent on the subscription rule applied.
(Please note that when a subscription is applied, it will determine which notifications are received. ie. If the subscription is set up for subcontractors, the notifications will only be received when the issue/defect/record or process/checklist reaches the stage for the subcontractors to take action)
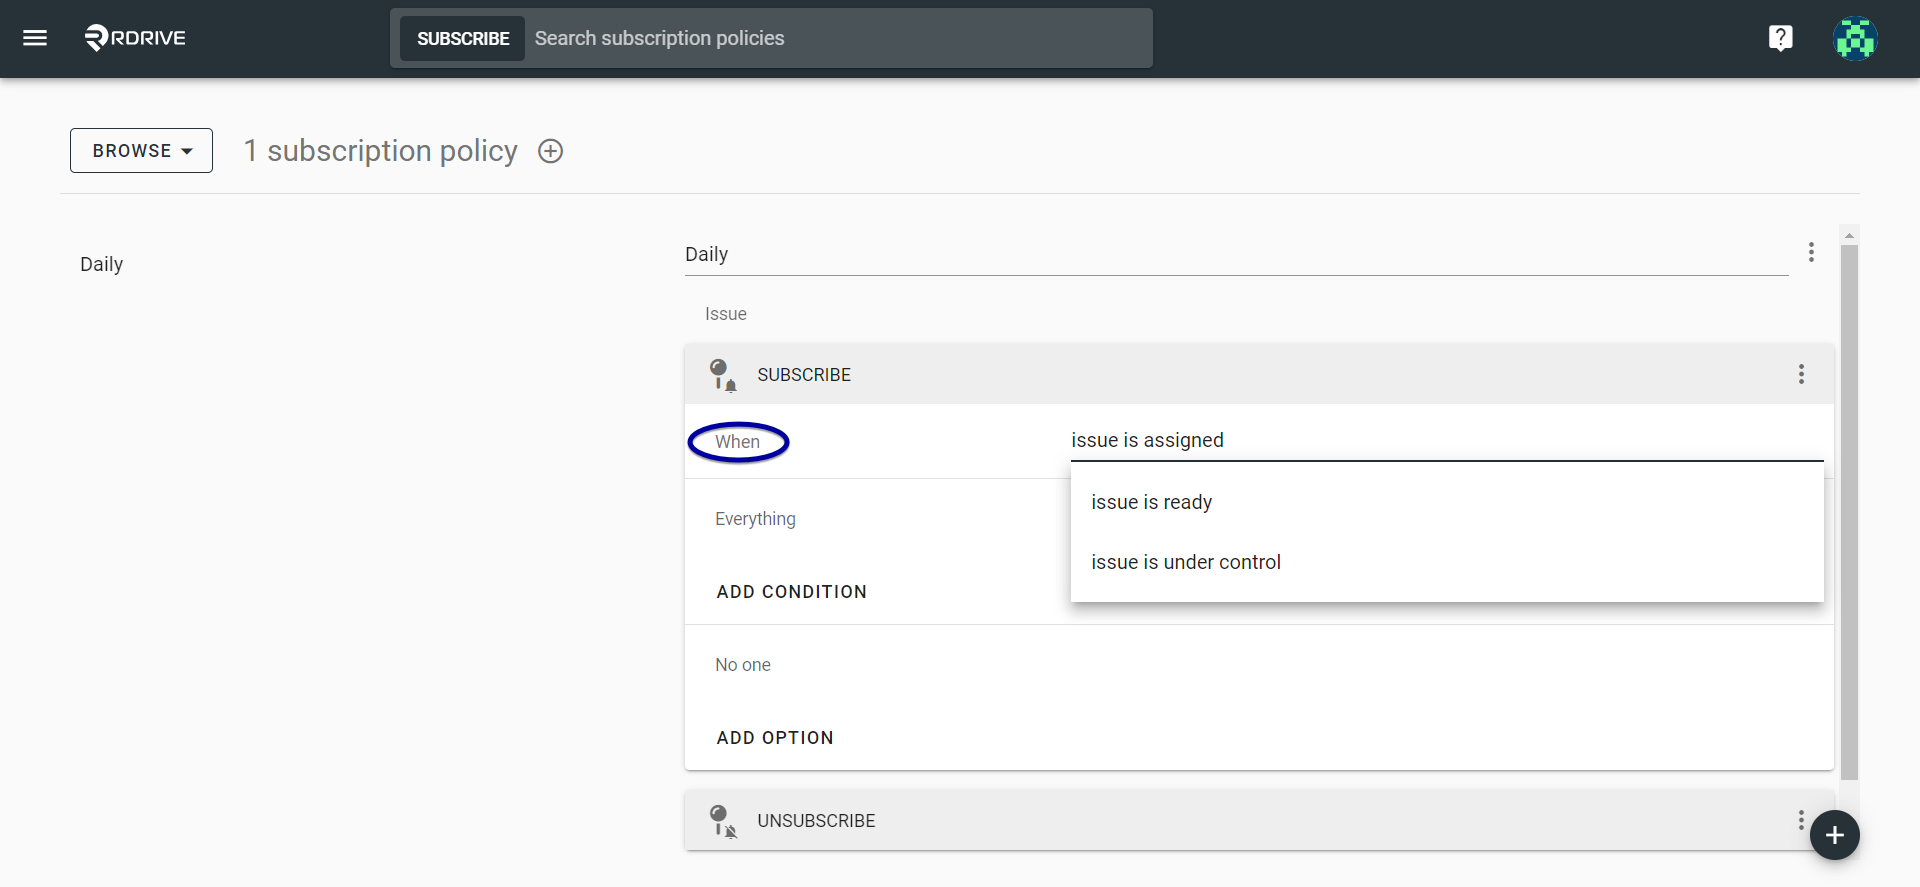
Adding a "Condition" will determine under what parameters the notifications are sent out. Not entering a condition will leave all options open.


You can now set the subscription to the relevant Team, Team Member(s) or User(s) as required via the "Add Option" dropdown.

Your subscription is now set-up!
Was this article helpful?
That’s Great!
Thank you for your feedback
Sorry! We couldn't be helpful
Thank you for your feedback
Feedback sent
We appreciate your effort and will try to fix the article