 |

Overview
How to change the company level Presets for the issue analysis dashboard
- Purpose: How to access and change the company-level Presets for the issue analysis dashboard
- Who It’s For: Users with access to the company level, Project Administrator
Prerequisites: Company-level access required, Project AdministratorStep-by-Step Instructions
✅ Step 1: Accessing the Presets at the Company Level
From the main home page, click the hamburger menu in the top left, at the top of the screen will be the current project you are working in, clicking this will allow you to "Select Site" using the dropdown, select “Company” at the top of the menu
This will then move you to company level access, Click the hamburger menu again, select “Settings”, and then “Presets”
Its worth noting when at company level the top banner will show as dark brown.
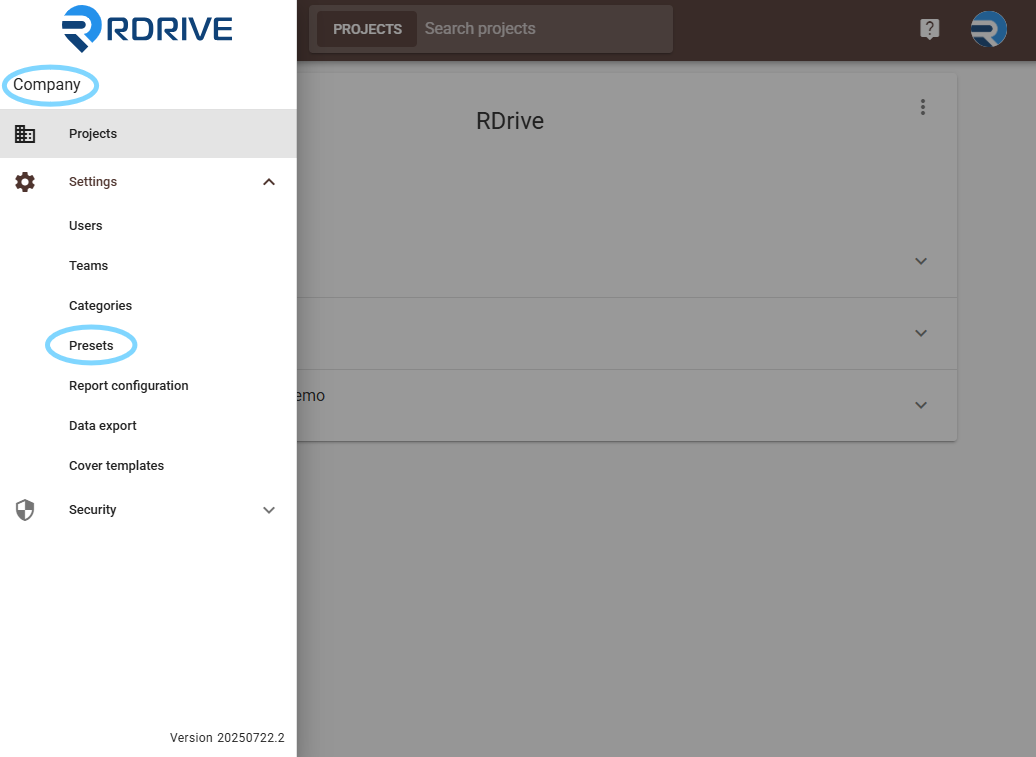
✅ Step 2: Adding the Lists to the Presets
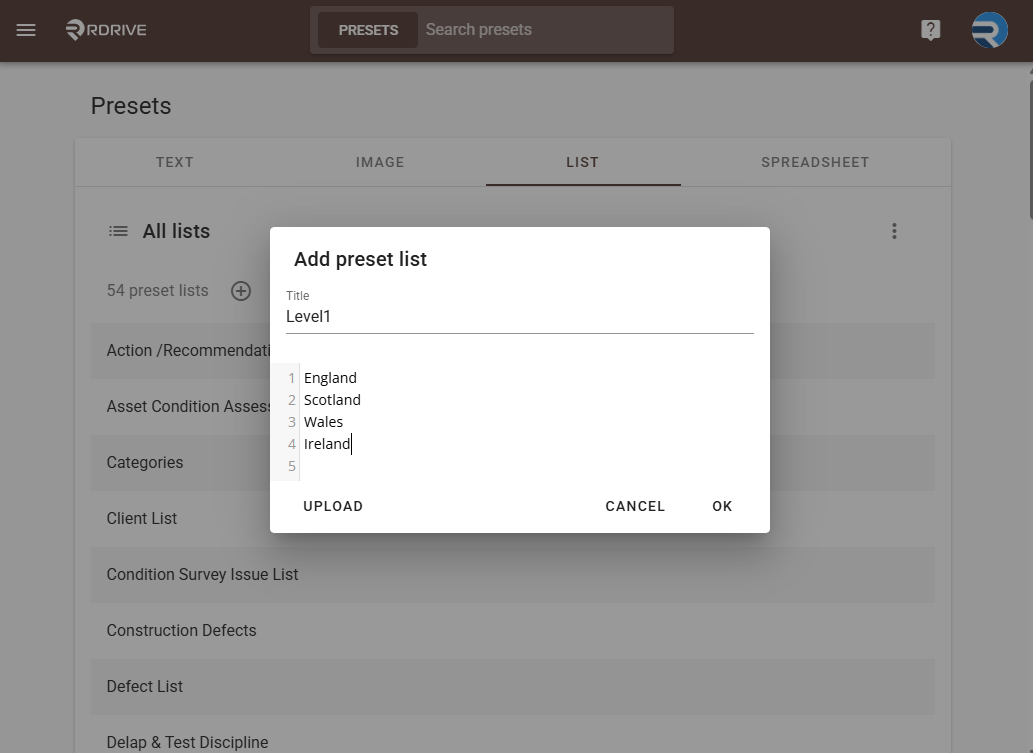
Once in Presets, click “List” in the top menu bar, then click the “+”, add the title “Level1” with no space. In the list below, add the users or countries (this can be configured to your requirements) Click ok when complete.
Now click the “+” again and do the same for “Level2” and Region, then “Level3” and sector adding "Region", "Sector" depending on requirement and hit ok once complete.
✅ Step 3: Adding and Linking the Text Presets
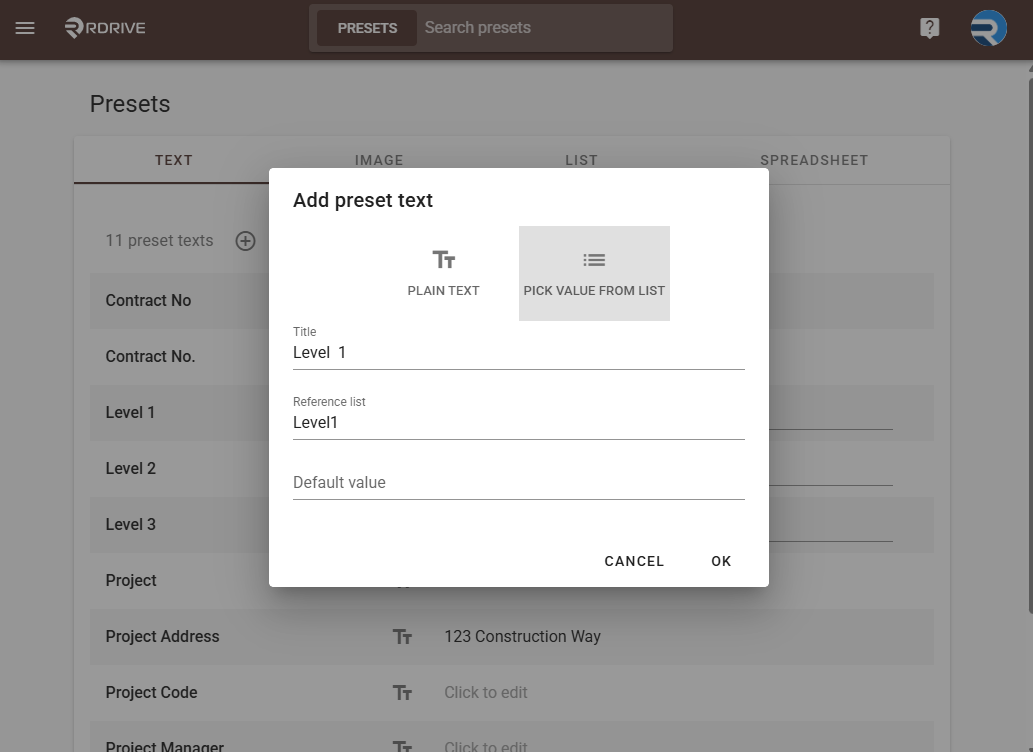
Click the “Text” tab from the top menu, click the “+” button to add a new Preset text, select “PICK VALUE FROM LIST” and add the title “Level 1”, This time with a space between ‘Level’ and ‘1’, click the “Reference List” dropdown menu and select “Level1” to link the Presets.
Repeat this process for Levels 2 and 3 and link them in the same way, this will mean the lists will link to each other and make these levels available to be used on other projects on the account.
Your Presets are now updated and available for use to feed data to the issue analysis dashboard.
for more on the Issue Analysis Dashboard click Here
FAQs & Troubleshooting
Q: Can I change how the Issue Analysis Dashboard groups data?
A: Yes. Grouping is controlled by company-level Presets, which define up to three hierarchical levels (e.g., Country → Region → Sector). These can be customised to suit your reporting needs, such as Project Manager → Principal Contractor → Build Type.
Q: How do I update the Presets used for grouping?
A: Switch to Company view from the site dropdown (the banner will turn dark brown). Go to Settings → Presets, then in the List tab create lists for Level1, Level2, and Level3. In the Text tab, create matching text presets, set them to “PICK VALUE FROM LIST,” and link them to the corresponding lists via the Reference List dropdown. These changes will update the grouping options available in the dashboard across all projects.
Was this article helpful?
That’s Great!
Thank you for your feedback
Sorry! We couldn't be helpful
Thank you for your feedback
Feedback sent
We appreciate your effort and will try to fix the article