To set up the form/issue template, you have to:
Create fields (i.e., an area to fill in data)
Name field and assign the data type✨✨
This article will let you know more about the field properties, describe to your what is that mean or what is that for :)
At Properties, you may name the title of the fields, assign data type, edit the date attributes, turn the mandatory of field on&off, manage tag(s), and locate the version reference.
Here we go.
Field title
Naming the field can help to identify it when we search, input and extract data.
It is useful for the dashboard, the criteria "DATA" on the searching engine and on the list view mode etc.
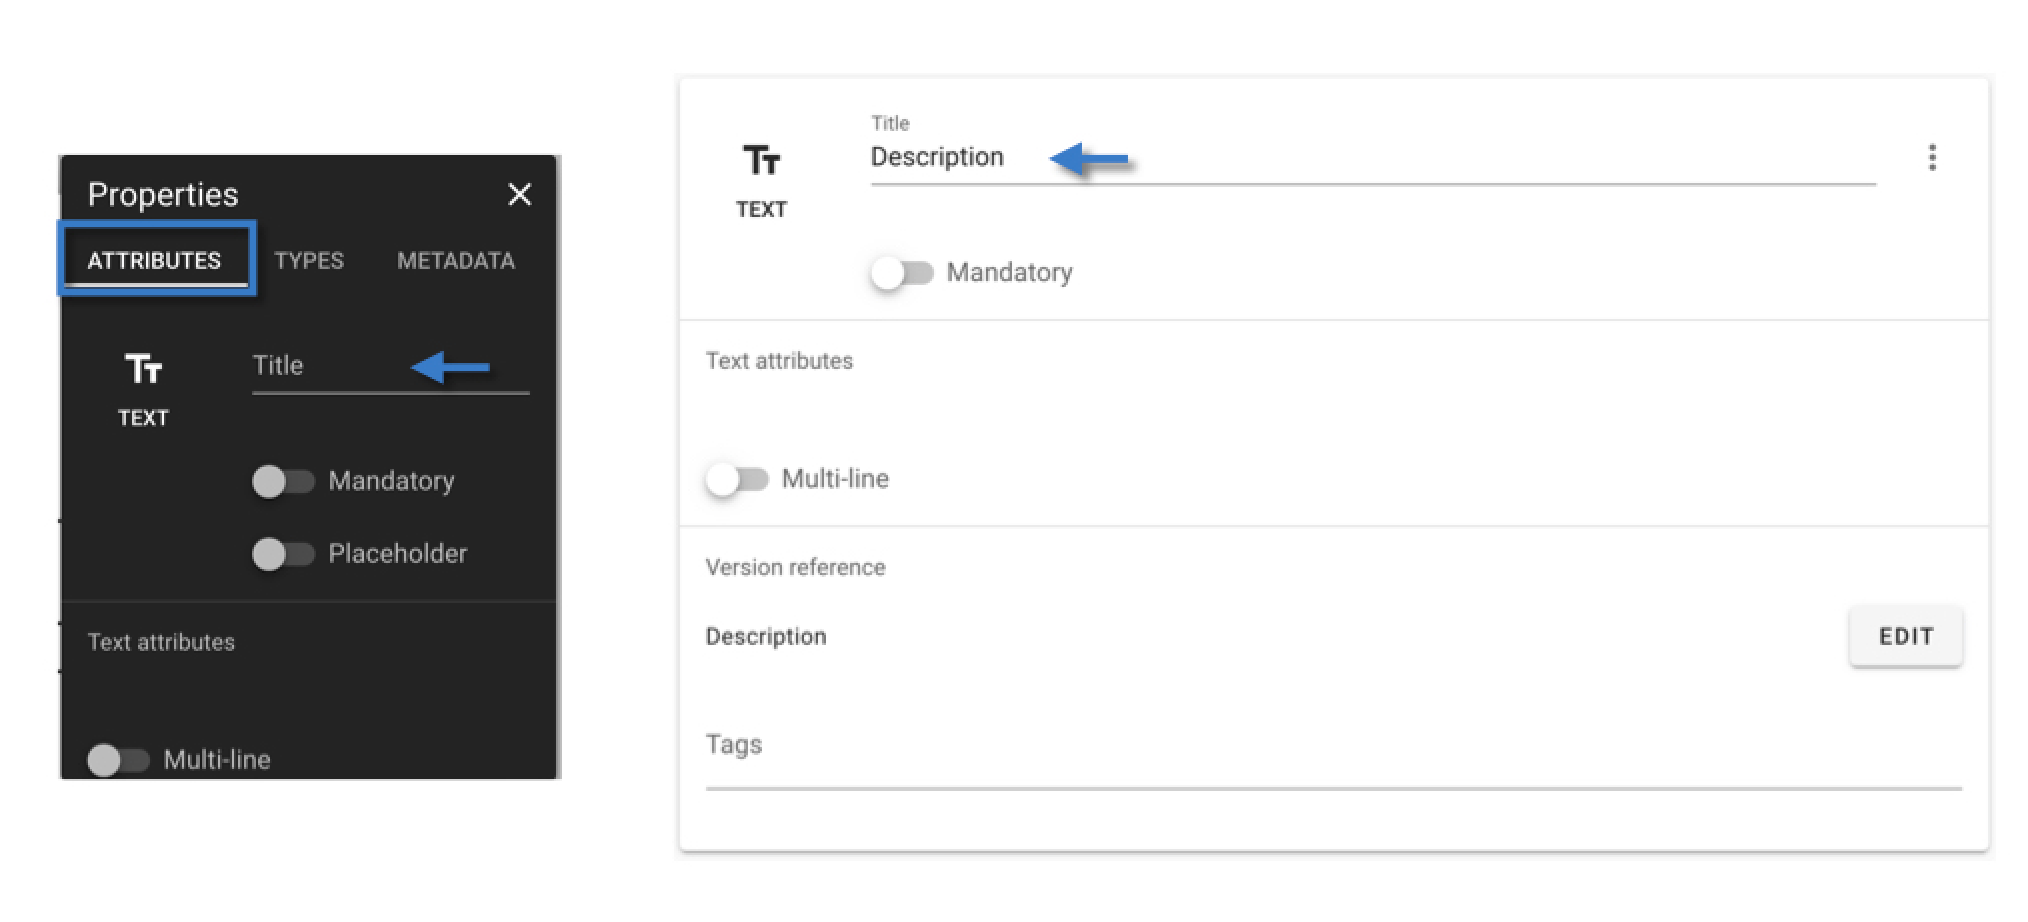
Field title is not necessary but quite important. For this purpose, we have the OCR function on the form wizard for you to set up easily.
Once you click on the title input area, the text on the form will be highlighted and you may click it to input.
The OCR is work by the form language.
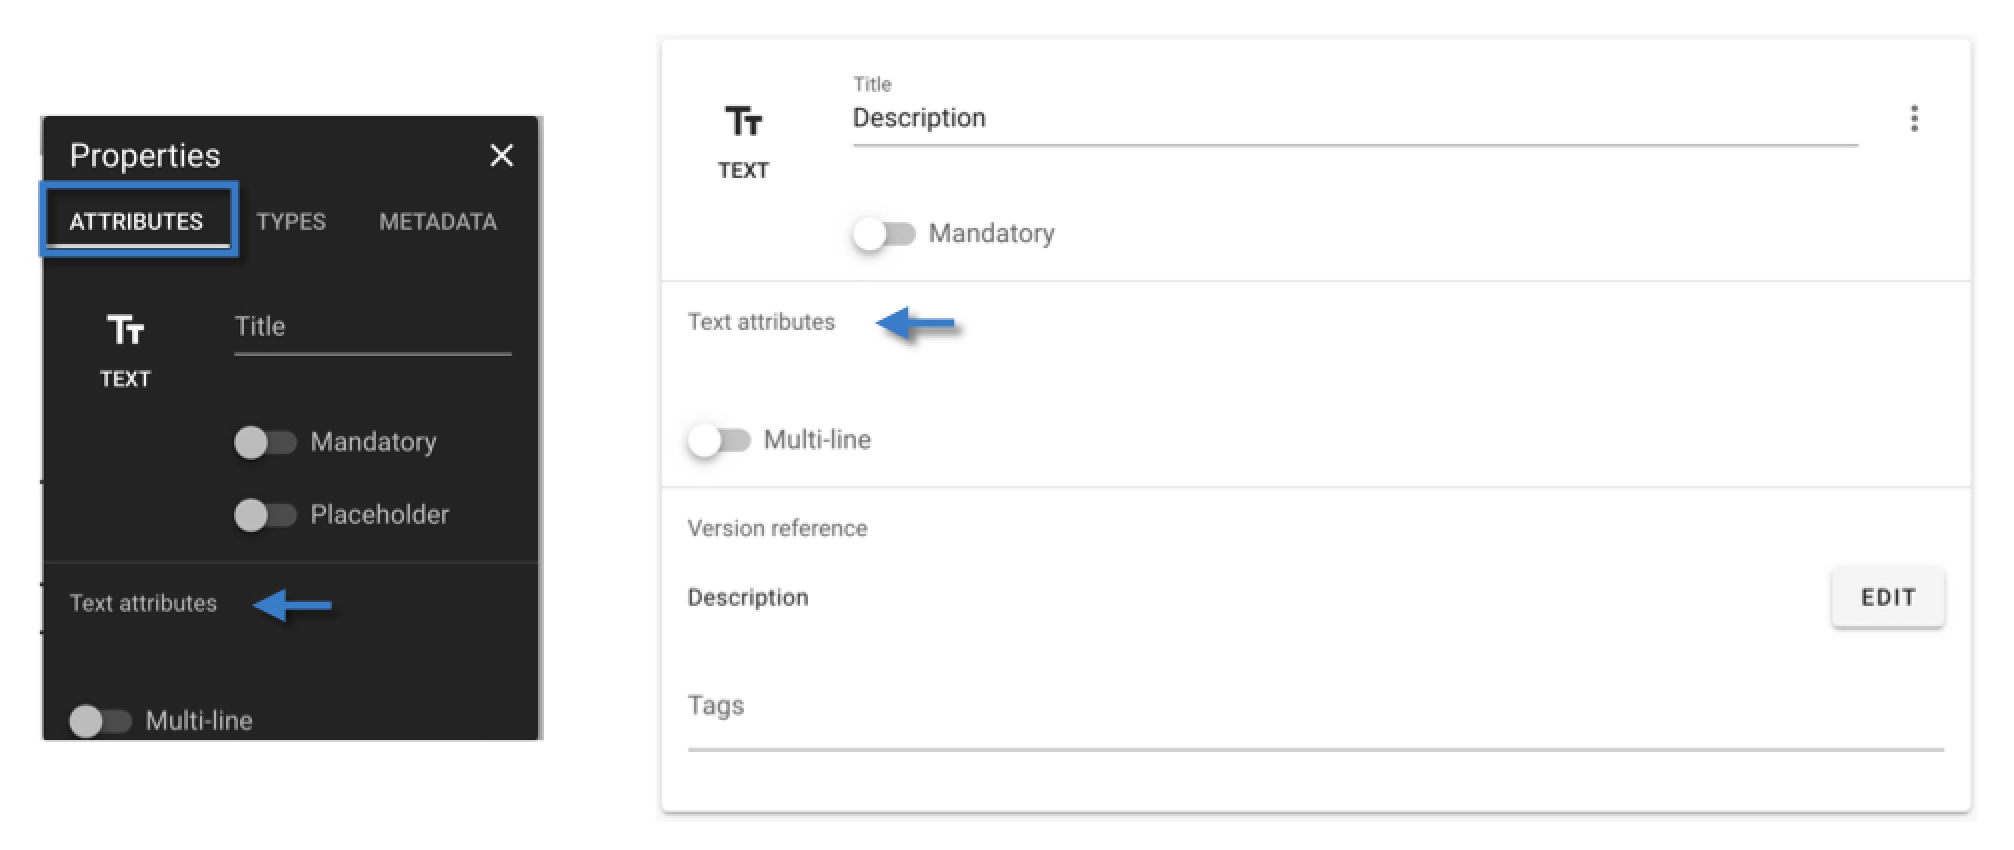
Data type & Data attributes
Based on the data type to set up the field can help you to collect the data in the correct format.
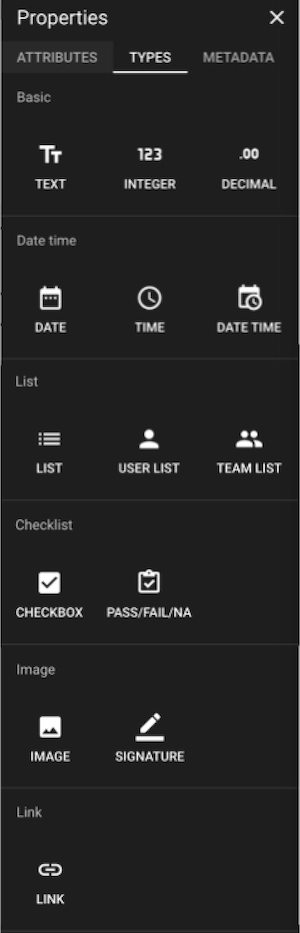
Here are the data types available:
Basic -
Text
Integer
Decimal
Date
Time
DateTime
List -
Checklist -
Pass/Fail/NA
Image -
Image
Signature
Most of the data types have their own attributes that can be adjusted, such as the text area, number range, format, etc, please choose the best for the template.
%
DateTime - The date and time format selection will be different depending on your account language.
#
User/Team list - The users/team who have the permission of access to the project will be listed for selection. The selected would be able to have functioned by the assignment rule to trigger notifications.
*
Checkbox - If you want to restrict the user to select one option among n number of options, you can set this up: select the fields, change the datatype to checkbox, right-click and select Link. To unlink, select the fields, right-click and select Unlink. If the fields do not have checkbox as datatype, you will not see link or unlink when you right-click at the field.

@
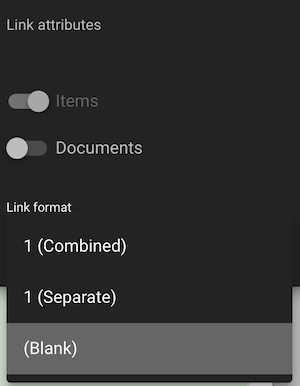
Link - At the link attributes, you decide what do you want to link with by this field, link items(issue&process) or link documents or both.
And you may select the link format, which can display as a quantity of the items in a combined or separate format, or Blank, not showing any data on the form/issue.
Can some data be automatically filled in?
Yes, you can set up read only fields. Once the form is created, the data will be automatically generated and displayed on the form. User cannot edit the read only fields:
Read only Integer*
Read only Decimal*
Read only Date*
Read only Time*
Read only DateTime*
Process ID
Drawing title (of where the form is created)
Location title (of where the form is created)
Created by User# (of whom created the form)
Created by Team# (of whom created the form)
Created Date (of when the form is created)
External reference

*
Use for an Output field of the computation. (The Preset text selection of the Read Only Text can be empty.)
Make field mandatory (Optional)
At Properties, if you enable a field to be mandatory:
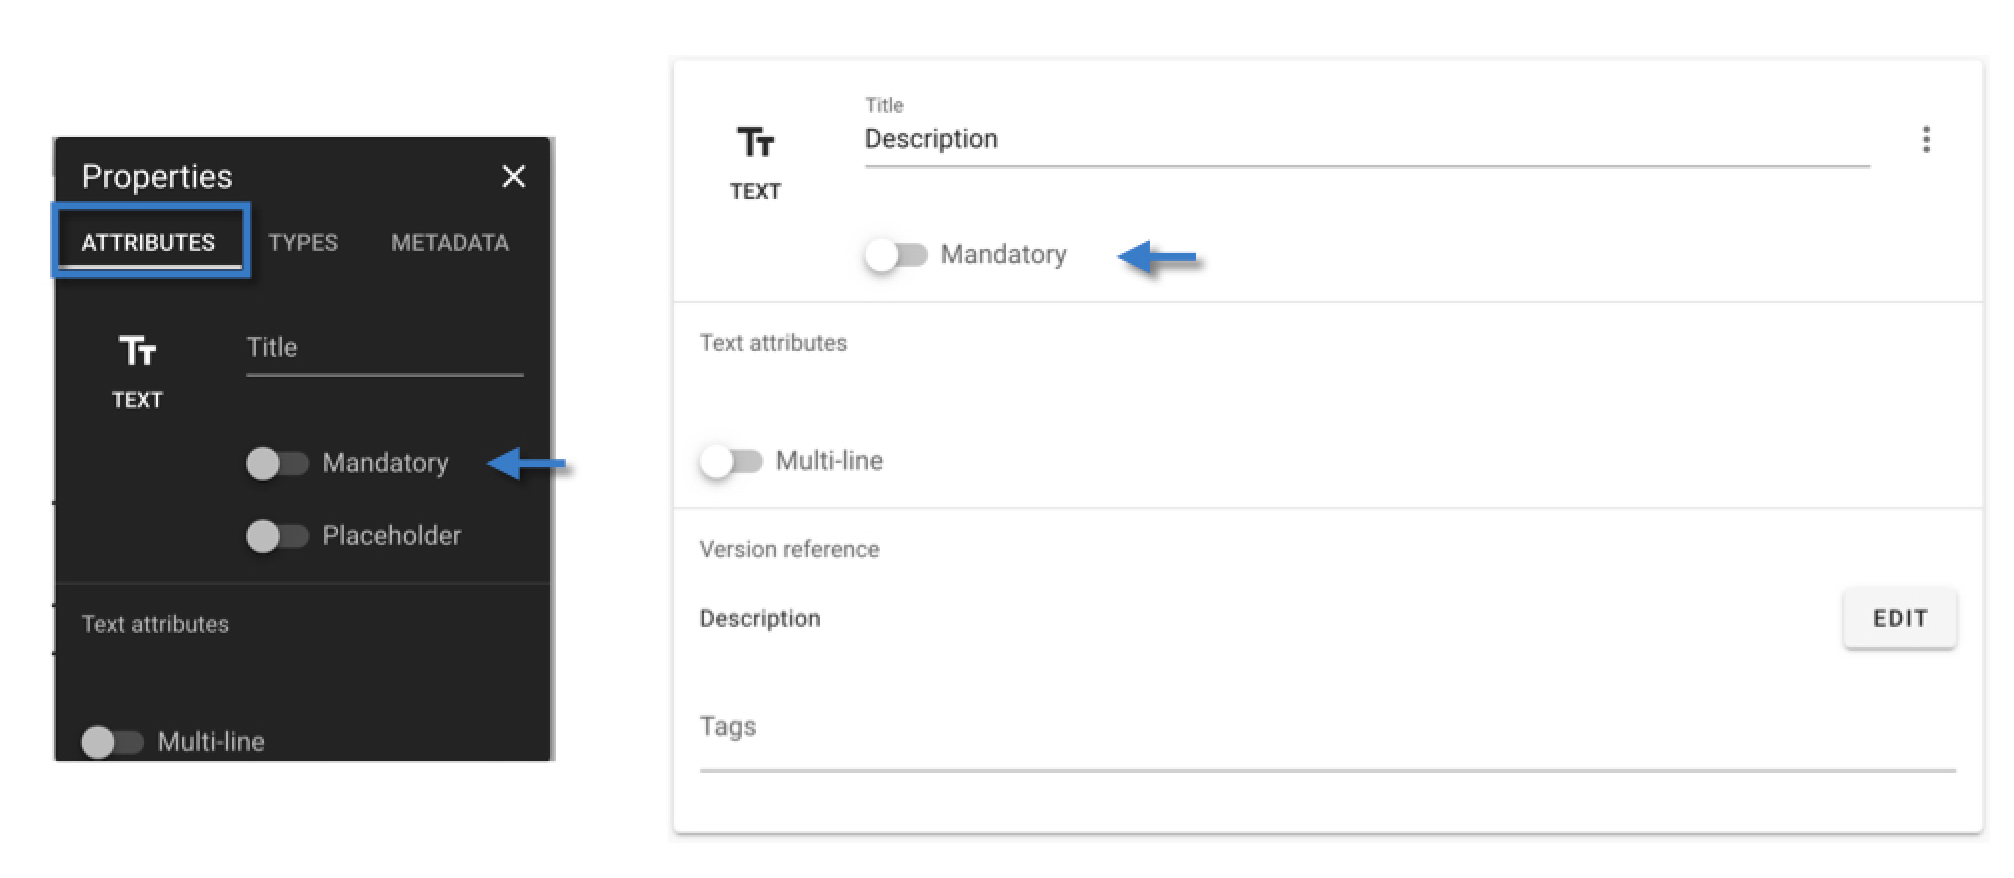
on the form view, the mandatory field colour will be pink; on the list view, will have a * at the title of the mandatory field;
RDrive alert users if they change the status of the form without filling out mandatory fields
RDrive calculates the percentage complete of the form based on the weighting given to each mandatory field
What value should I put in for weighting?
If you have two mandatory fields, and the weighting is 1 for each field, the total value will be 2. If one field is completed and another is not, the completion percentage will be 50% (1/2).
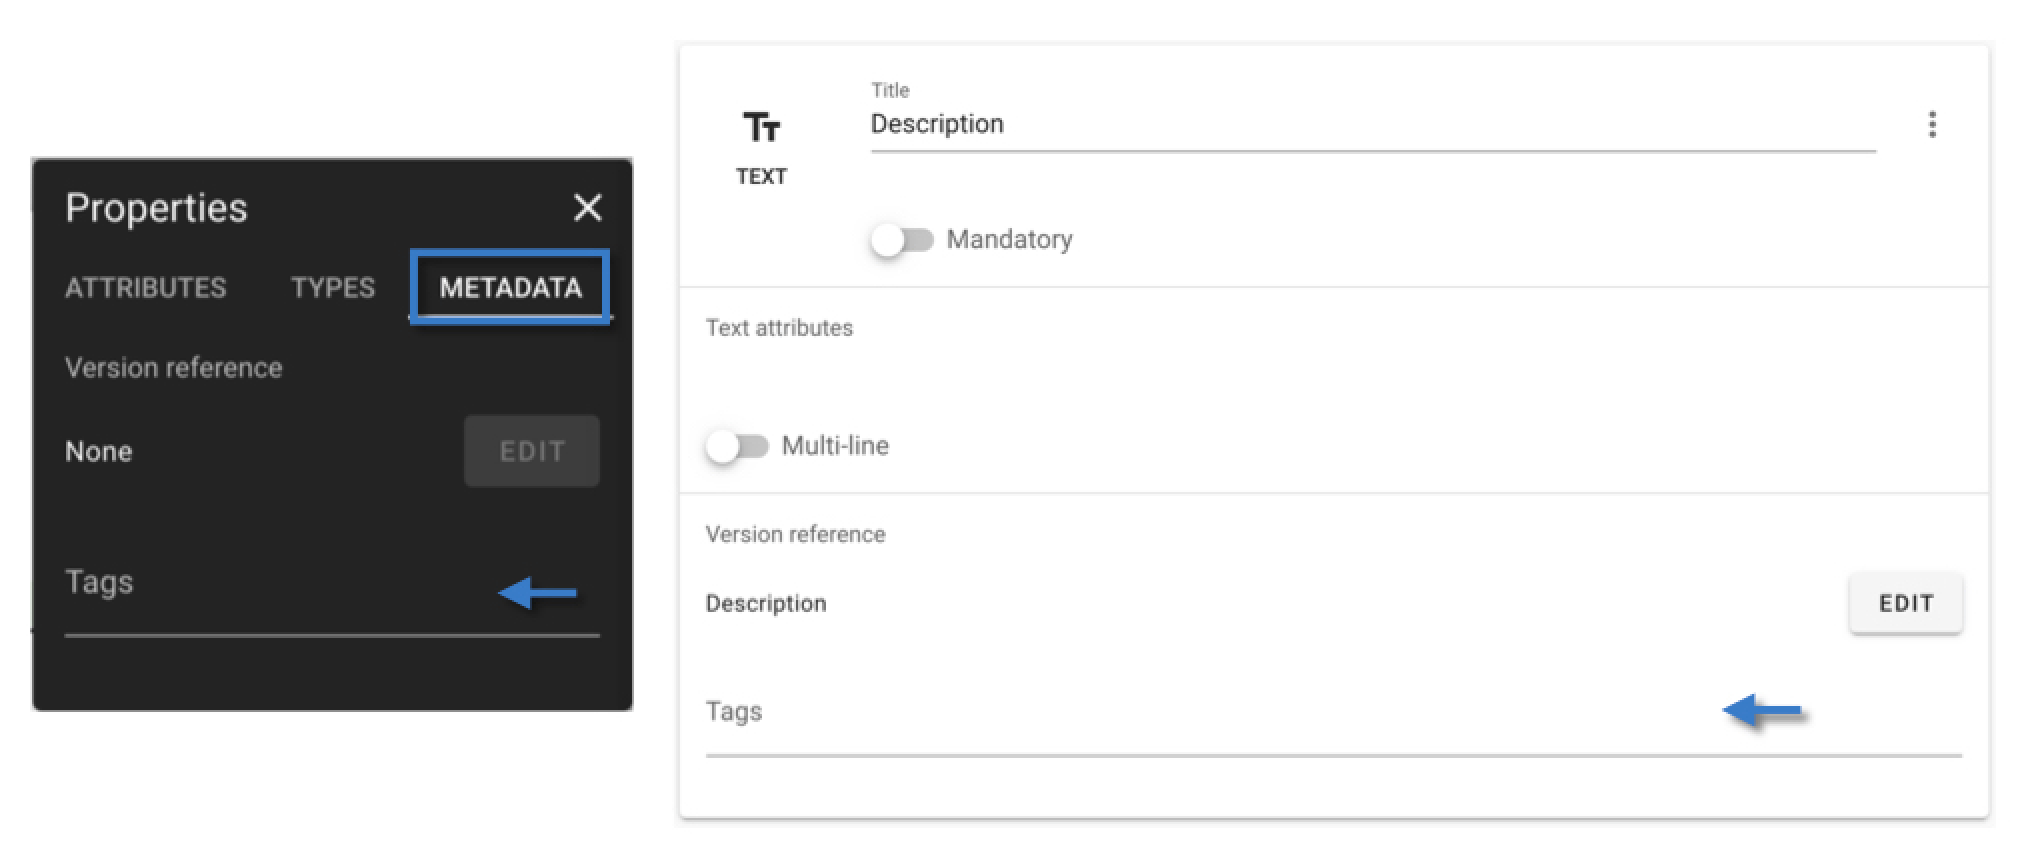
Tag(s)
You may add/remove the field tag from the metadata area as below.
Check here to know more about tag.
Was this article helpful?
That’s Great!
Thank you for your feedback
Sorry! We couldn't be helpful
Thank you for your feedback
Feedback sent
We appreciate your effort and will try to fix the article