Form Wizard Setup Guide
Once you have added a new form template and uploaded the form image, you will be directed to the page below, known as the "Form Wizard".

To configure the form, you will need to:
- 1. Creating Fields
- 2. Naming Fields and Assigning Data Types
- 3. Setting the Form Status
- 4. Saving Changes
Overview of the Form Wizard Interface
At the top of the form page, from left to right, you will find the process list, version list, form list, and the current form title. These sections allow you to easily navigate between forms and open the desired one within the Form Wizard.
- Process list

- Version list

- Form list (Opened forms will be displayed as tabs for easy access.)


Below the tabs, you will see several buttons representing different functionalities, including:
- Save
- Undo, Redo
- Move tool, Pencil tool, Magic tool
- Field Properties
- 3 dots ⋮ icon for More tools (Form Status, Computation, Data capture, View option, and Setting of the Sensitivity panel)

- Page list and Zoom options
1. Creating Fields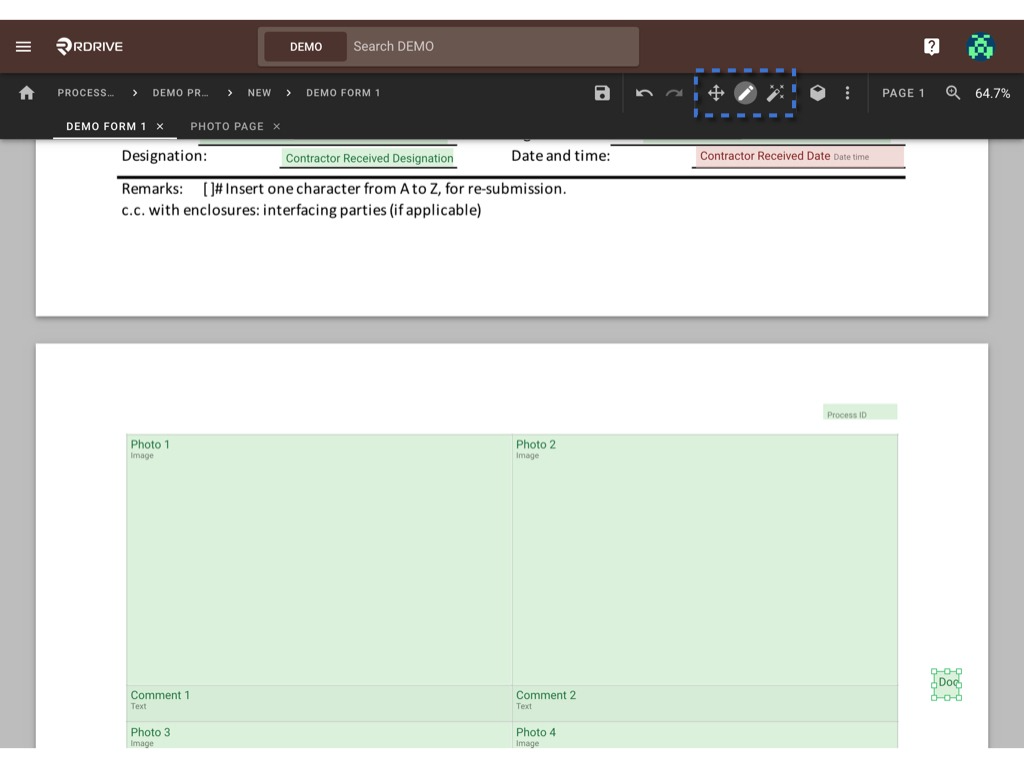
- Select Fields: Click the corresponding icon (or use ⌘/Ctrl 1) to select fields. ( ☩ )
- Create Fields (Manual): Click this icon (or use ⌘/Ctrl 2) to manually create fields.
- Create Fields (Edge Detection): Click this icon (or use ⌘/Ctrl 3) to create fields based on edge detection.
Example Use Cases:
Select Hotspots: Click this icon to multi-select fields and make batch changes.
Examples:
- Copy (⌘/Ctrl C) and paste (⌘/Ctrl V) fields from one page/form to another.
- Update the data type of fields.
- Modify field titles.
- Link checkboxes.
Note: Edge detection may fail if lines are not clear or well-defined. Use the Move tool (⌘/Ctrl 7) to adjust edge sensitivity as needed.
You can also use the page list and zoom options to adjust the viewer while setting up the fields.

2. Naming Fields and Assigning Data Types 
Click the icon (or use ⌘/Ctrl 4) to open the field properties.
In the Field Properties panel, you can:

- Name the fields in the Attribute section.
- Assign the appropriate data type in the Types section.
- Toggle the placeholder option.
- Set fields as mandatory.
- Edit metadata.
For more detailed information, please refer to the Field Properties documentation.
3. Setting the Form Status
To manage the form status, click the Form Statuses option (⌘/Ctrl 6) in the more tools list. This will open the form status dialogue, allowing company administrators to manage statuses for the form.
By default, three statuses are provided:
- Draft
- Open
- Closed
- Add
To add a new status, click the ADD button in the bottom right corner. You can then:
- Select the status stage.
- Choose a color to represent the status.
- Enter a title and add status tags.
- Adjust conditional editing settings.
Click OK to confirm.
- Delete
If necessary, you can delete an existing status by selecting it and clicking DELETE.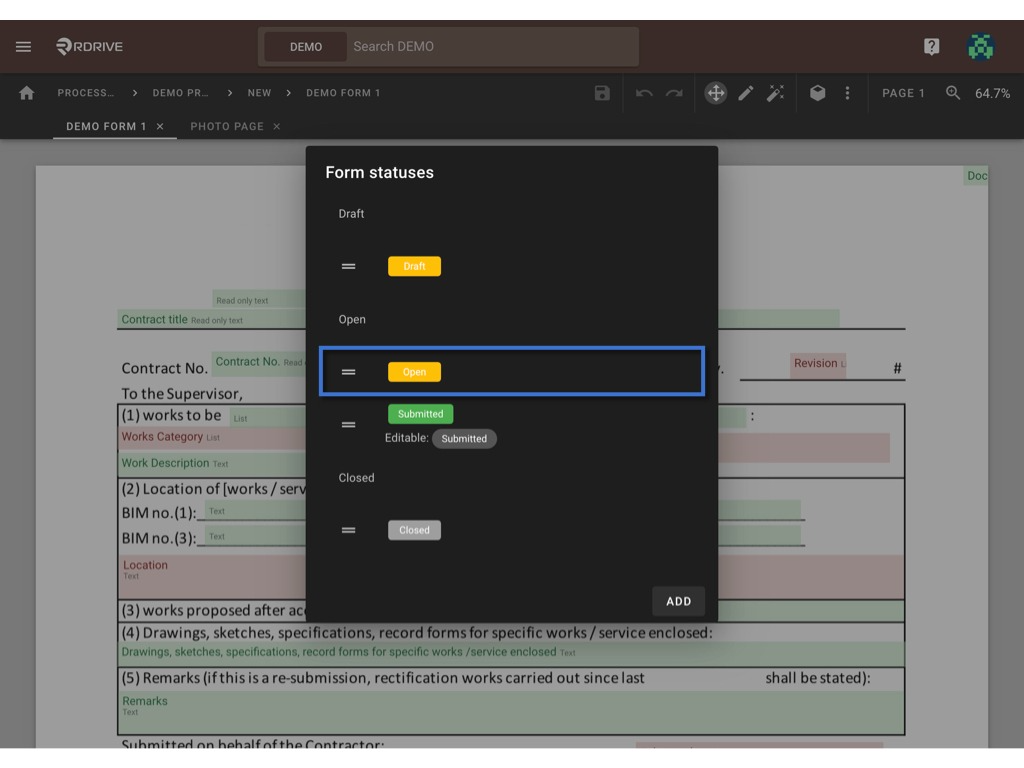
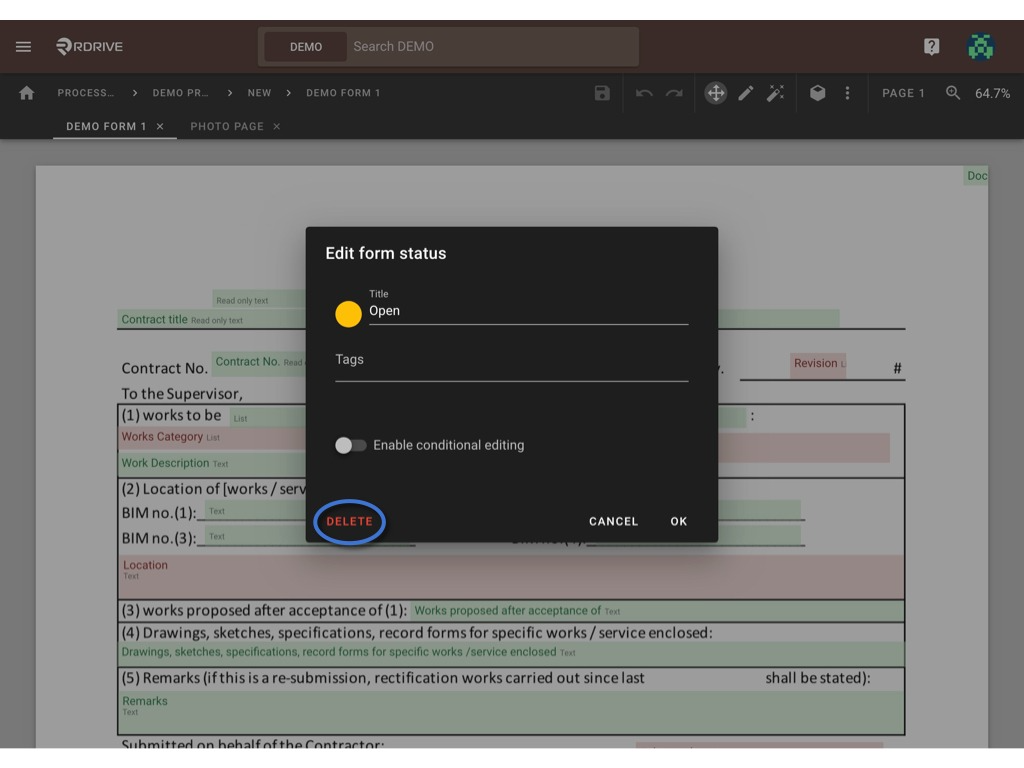
- Edit
Additionally, you can edit any status as required by clicking into it, making changes, and saving.

- Exit
To exit the dialogue, click outside the box.
4. Saving Changes
Always remember to save your changes by clicking the SAVE button.
Once all changes are finalized, you can return to the template page to publish the form as a new version.
Was this article helpful?
That’s Great!
Thank you for your feedback
Sorry! We couldn't be helpful
Thank you for your feedback
Feedback sent
We appreciate your effort and will try to fix the article