It is common that different supporting documents come along with the form itself.
RDrive allows you to attach document(s) to a form. If you are already working on a form, and have to attach documents here's how you can do it:
(You will not be able to attach any documents to the form when it is at closed status)
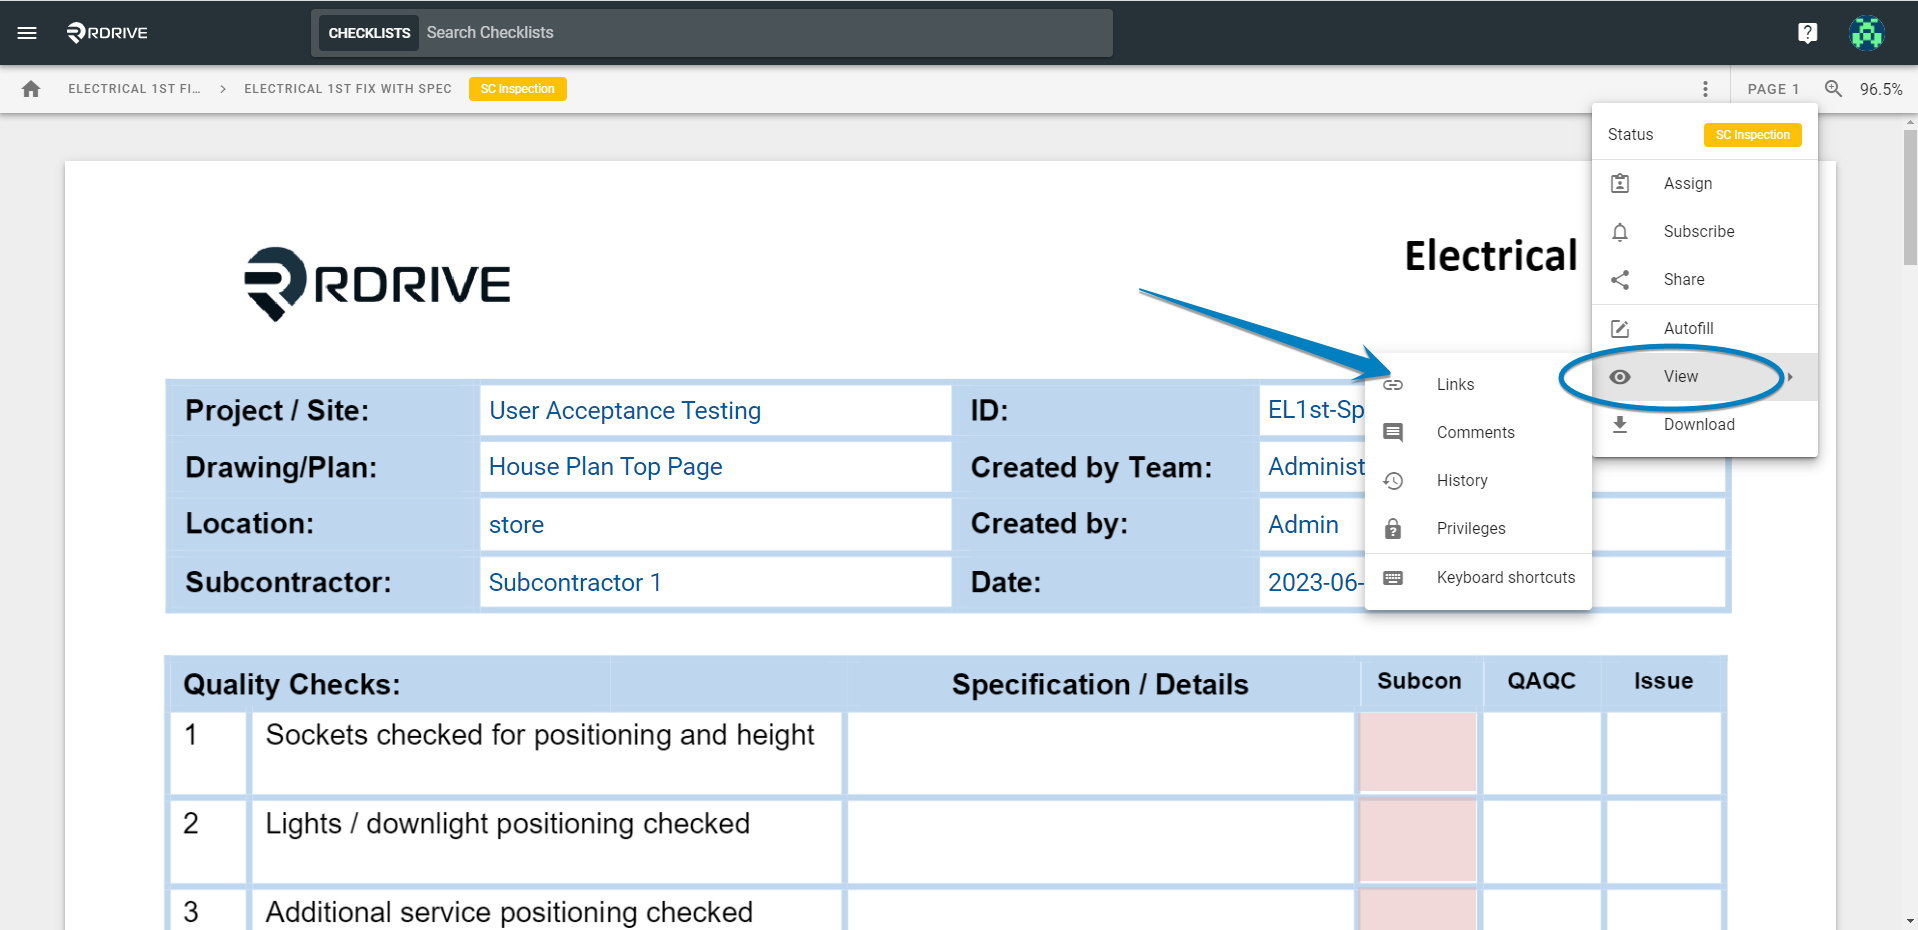
Gain access to the form viewer page by selecting your category and subcategory. Once you are in the form viewer, simply press the 3 dots ⋮ icon to explore the dropdown menu and select "Links" via the view option in the Menu as shown below.

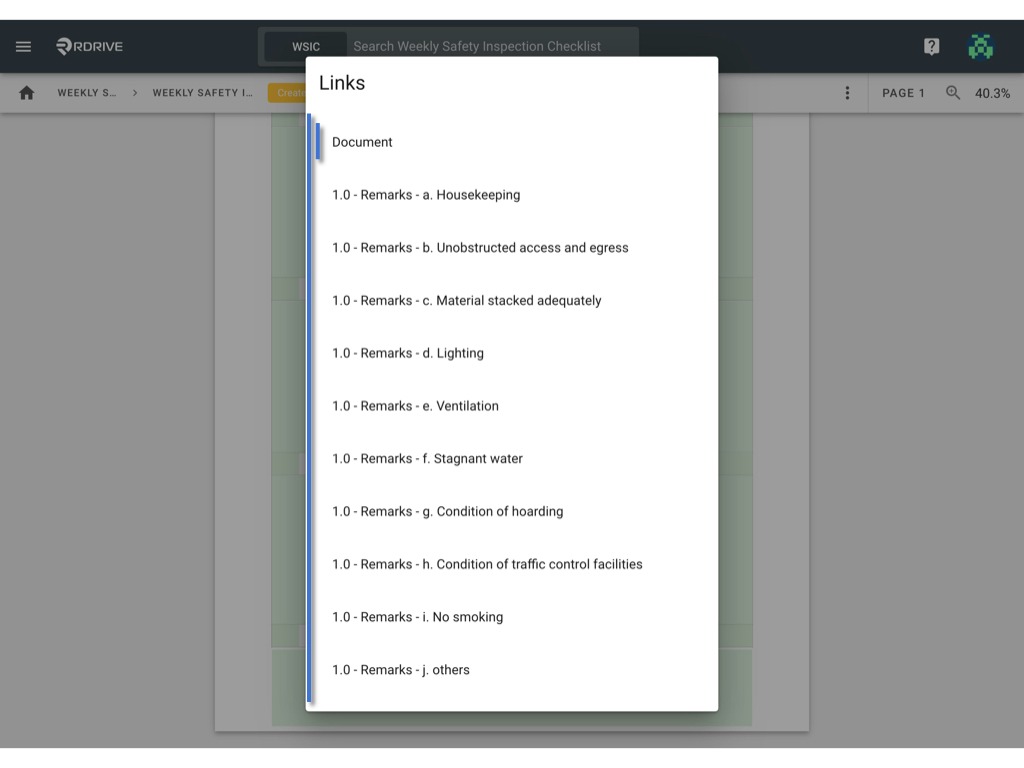
All the link fields of this form will be listed by the field title for your selection as shown below. Now simply select the relevant documentation as required.
(Please note that this page would be skipped if there is only one link field on the form)
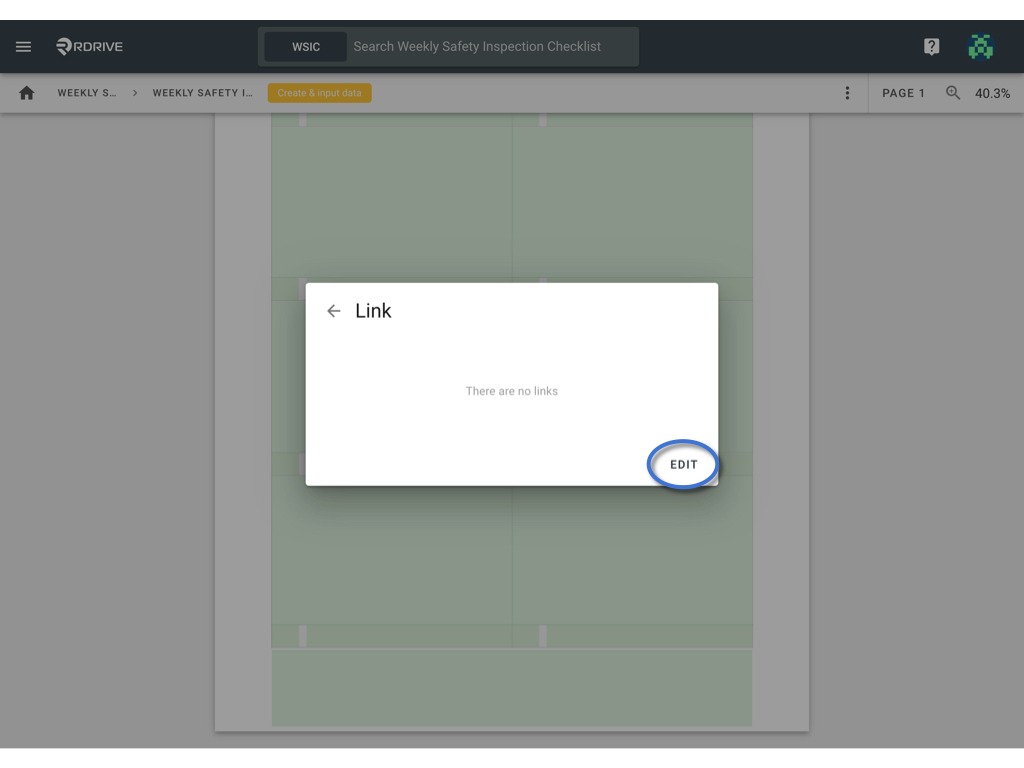
The linked items will now be shown if any are available, for the purposes of this example none are available. Now simply press "EDIT" to edit.
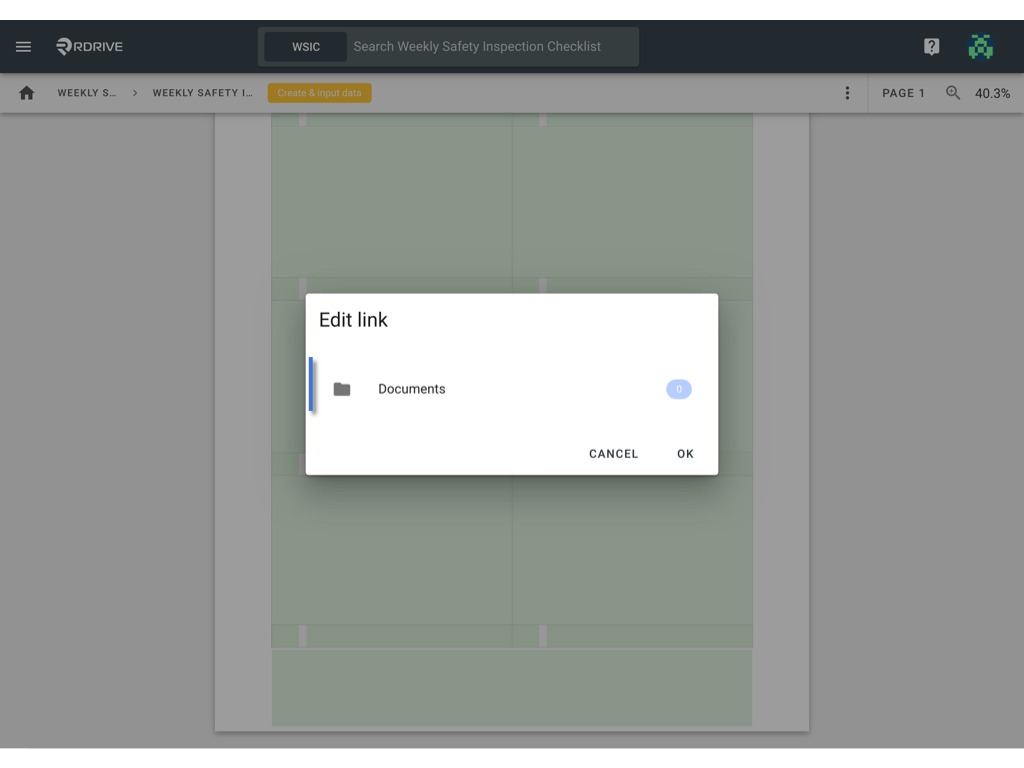
Now you need to select the relevant link attribute, for the purpose of this example, we will select "Documents" and press "OK" to confirm your selection.
Upload the document(s) from your desktop.
In RDrive, you can upload any documents with no file type and size limit!
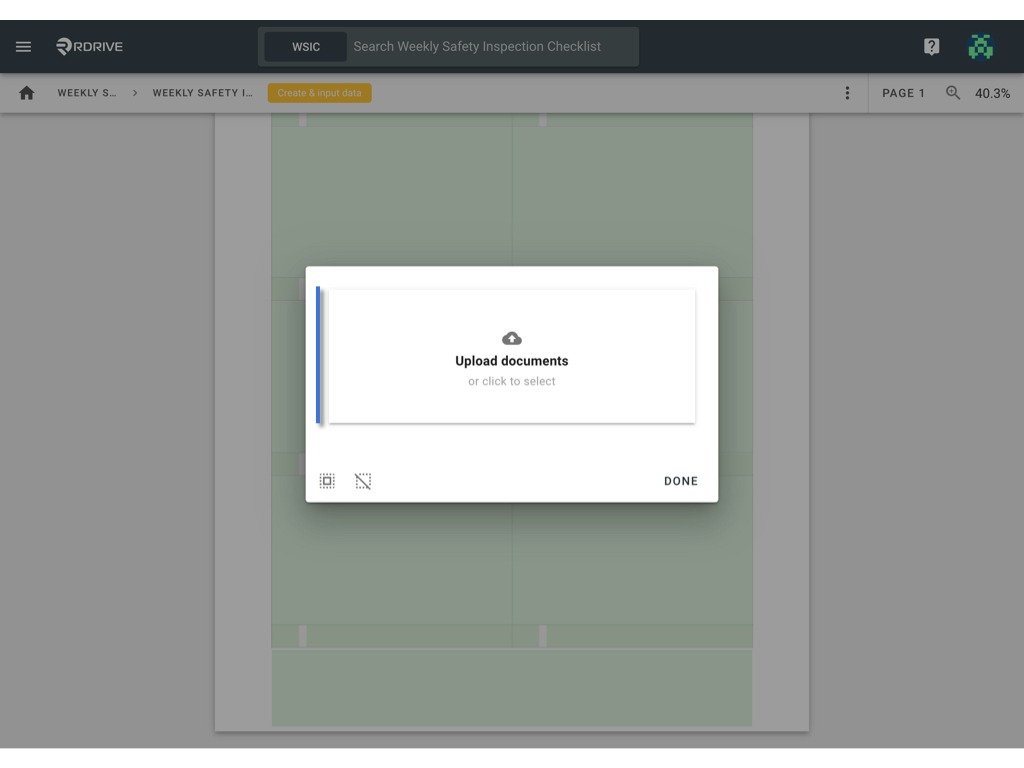
The uploaded document(s) highlighted in the grey background below are active linked documents.
Once you have selected the relevant documentation, simply press "DONE" to confirm.

Your documentation is now added.
You will see confirmation of this in the Edit Link window as shown highlighted below, as you can see 1 document is now uploaded. Now you can simply press "OK" to save your work.
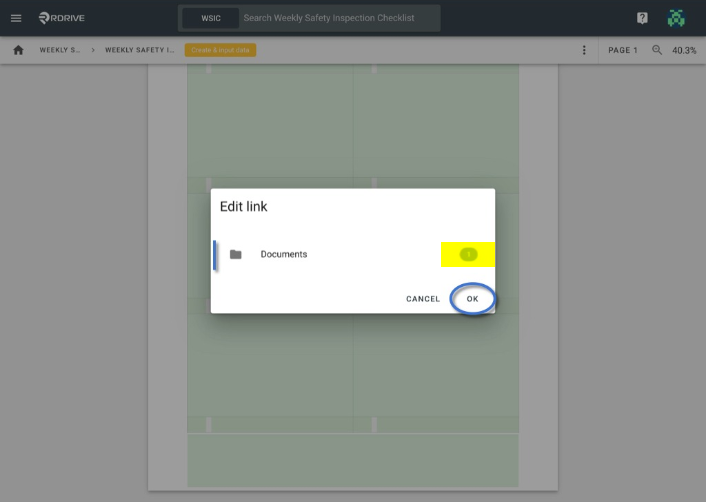
Pressing outside of the Link window or pressing the Esc key will close your action.

If the document is a PDF file, you can also merge it with the process into one PDF file while downloading!
Click here to know how to create a LINK field on form.
Was this article helpful?
That’s Great!
Thank you for your feedback
Sorry! We couldn't be helpful
Thank you for your feedback
Feedback sent
We appreciate your effort and will try to fix the article