In order to edit/update a form you will firstly need to select the correct form via the category and subcategory.
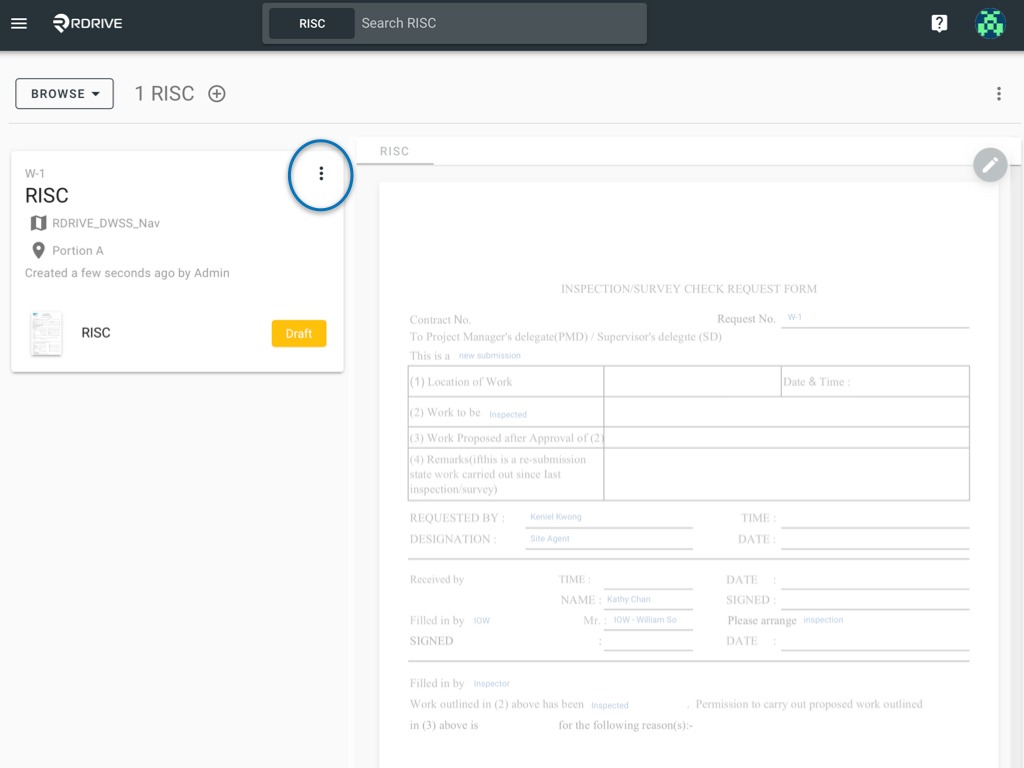
Once you have your form, simply press the 3 dots ⋮ button as circled below and press "Edit" to open the form.
Alternatively, you can double click the form for it to be opened.

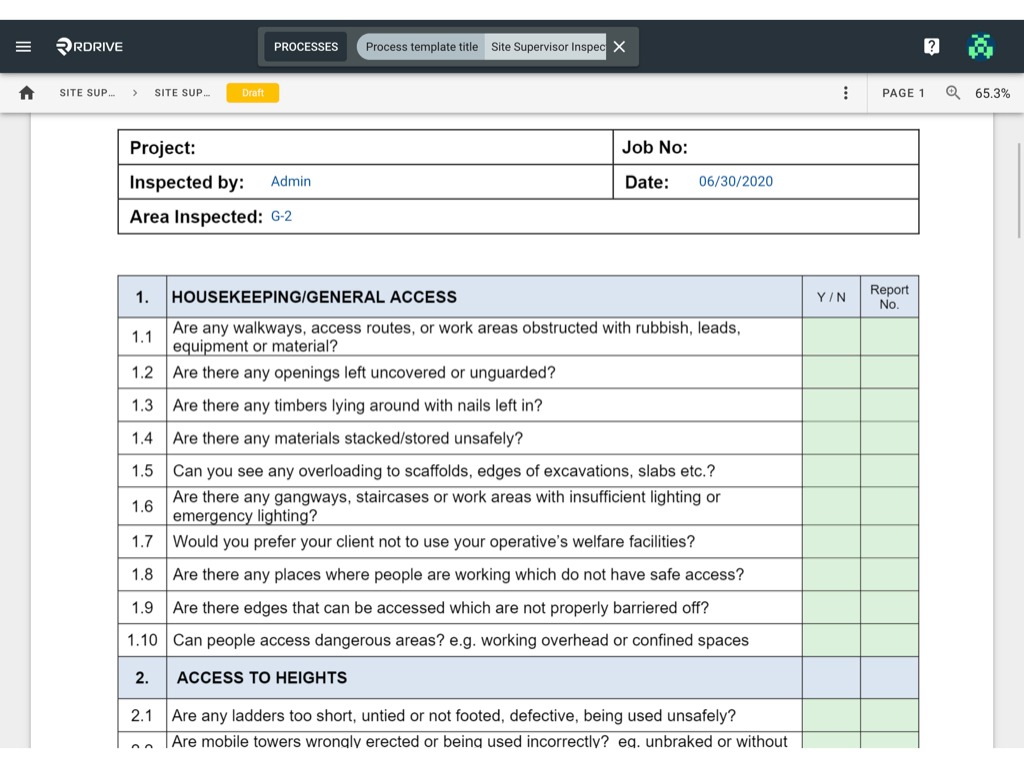
In the form viewer, you should see the fields available for edit at the current status.
In this example, the form is in Draft status (this can be seen towards the top of your screen in orange).
Fields in red are mandatory fields, meaning you should fill out the fields before passing the form to the next status.

Please note that any edits performed are auto-saved as standard. This means you are not required to click any Save button for your work to be stored.
However, to indicate the form is ready for the next party to review, you must change the status of the form. Failure to change the status of the form will result in the form workflow stagnating and not being visible to the next team along the workflow.
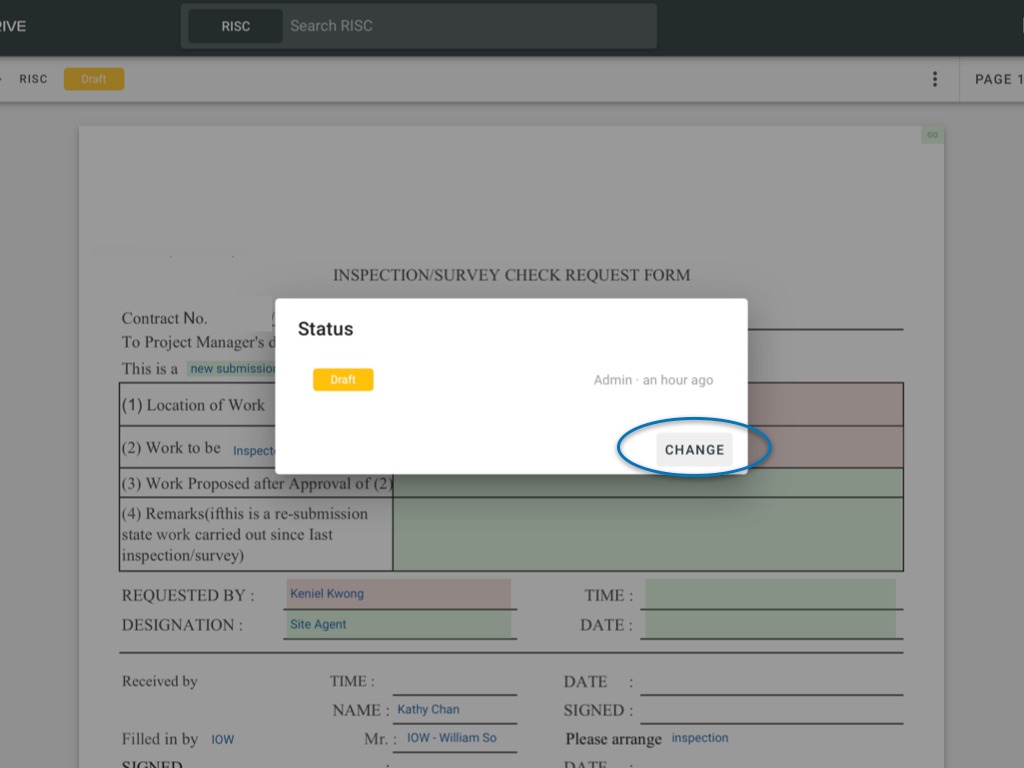
To change the status, simply press on the current status as circled below.

Here you will see the form status window enlarged in the centre of your screen.
In this example this form is newly created so there is only one history in record. Press "CHANGE" to update the status.

In the screenshot below, we are showing all statuses of this form as a demonstration only. Please note that the terminology used on your project may also differ to those listed in the image below.
In actual operation however, you will only see limited options based on overall permission settings. Please speak with your Project Admin team if you are unsure about your permissions.
For example:
· The submitter will only have the option to change to ‘Submitted’;
· The receiver will only have the option to change to ‘Received’ and ‘Delegated’;
· The inspector will only have the option to change ‘Inspected / Surveyed’; etc.

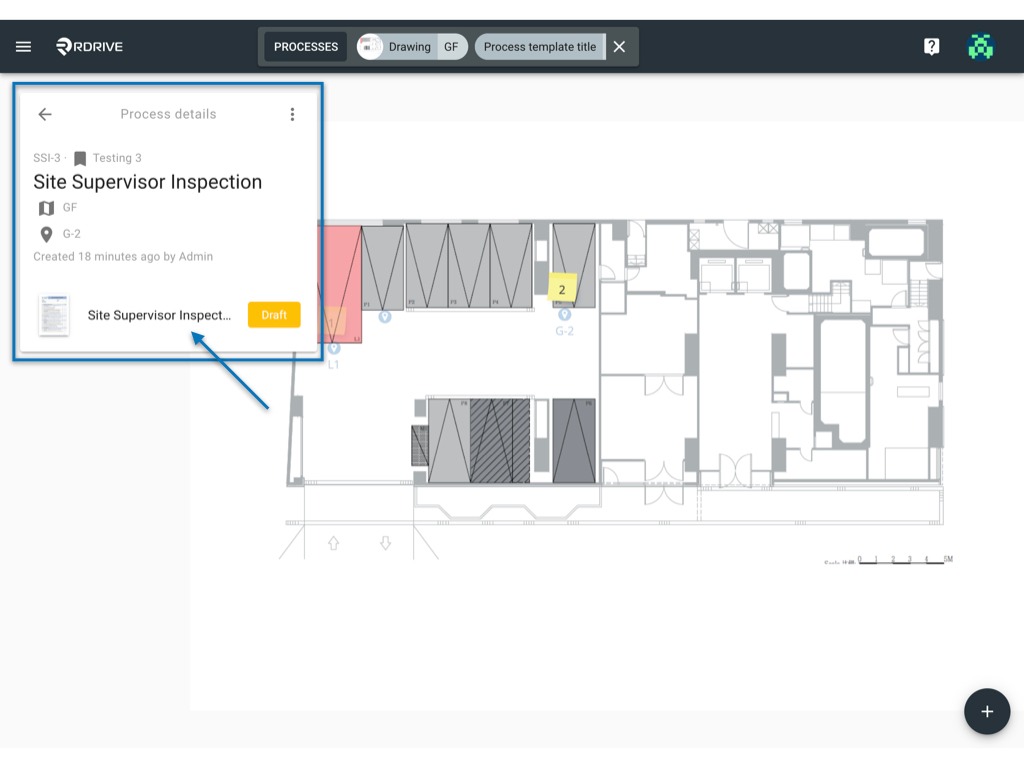
Select the post-it via Plan Viewer as circled below, then select the relevant form to be edited.


Press into the form via the process detail box on the left-hand side of your screen to open the form viewer. From here you can edit your form as shown below.


Was this article helpful?
That’s Great!
Thank you for your feedback
Sorry! We couldn't be helpful
Thank you for your feedback
Feedback sent
We appreciate your effort and will try to fix the article