You will firstly need to share with other Teams/Users to give them permission to view the issue/defect/record.
Sharing gives ad-hoc read access to other users. You can choose which individual users you wish to share with.
Users who have edit rights but not read access will be able to edit after you have shared with them. Those who are shared are called “participants”.
TABLE OF CONTENTS
Via Issue Finder
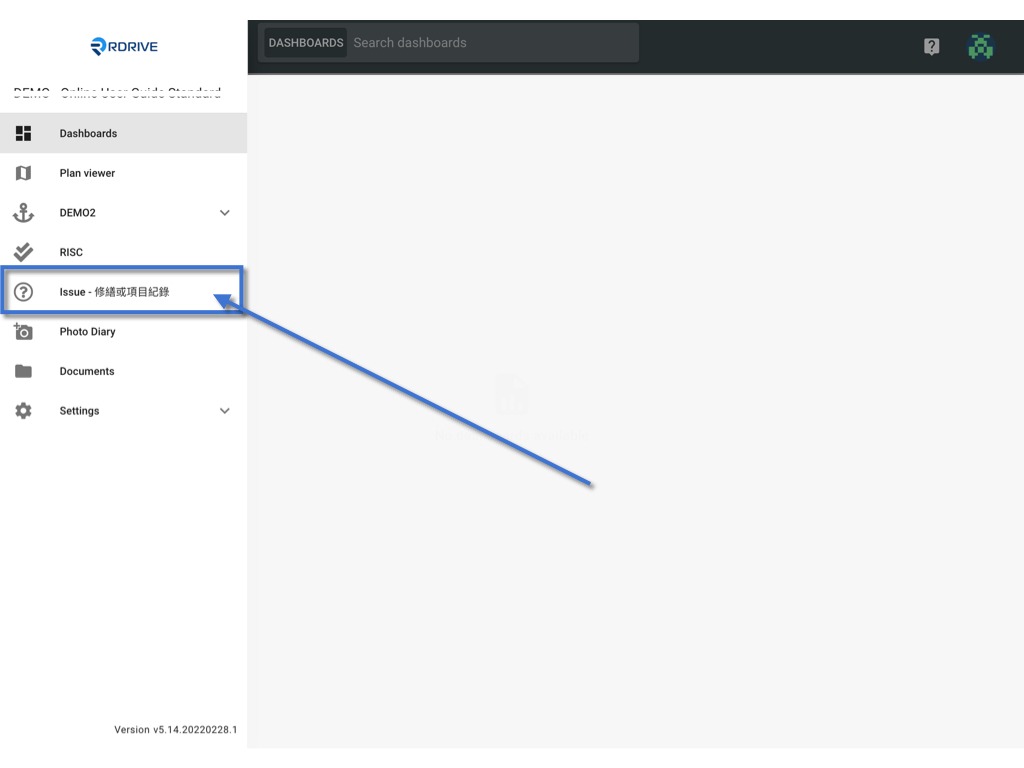
Simply press the Menu icon ≡ in the top left corner of your screen to unfold the Menu and to gain access to the Issue page by selecting the category and subcategory required as shown below.

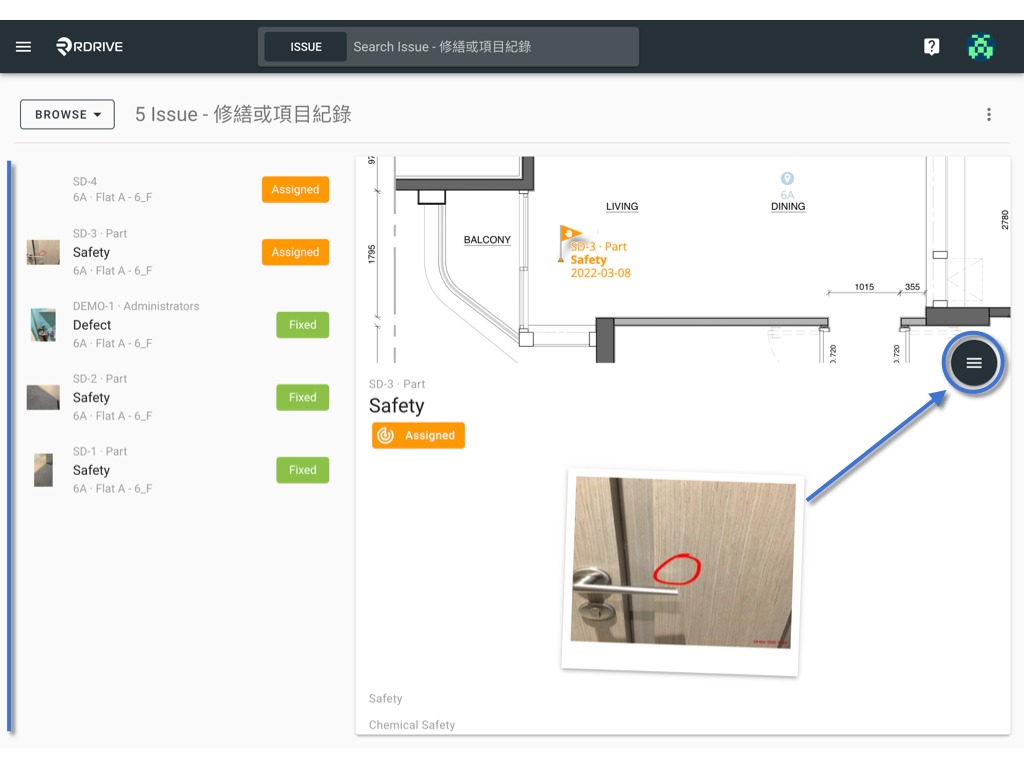
Choose your required issue/defect/record and press the ≡ button to expand the menu.
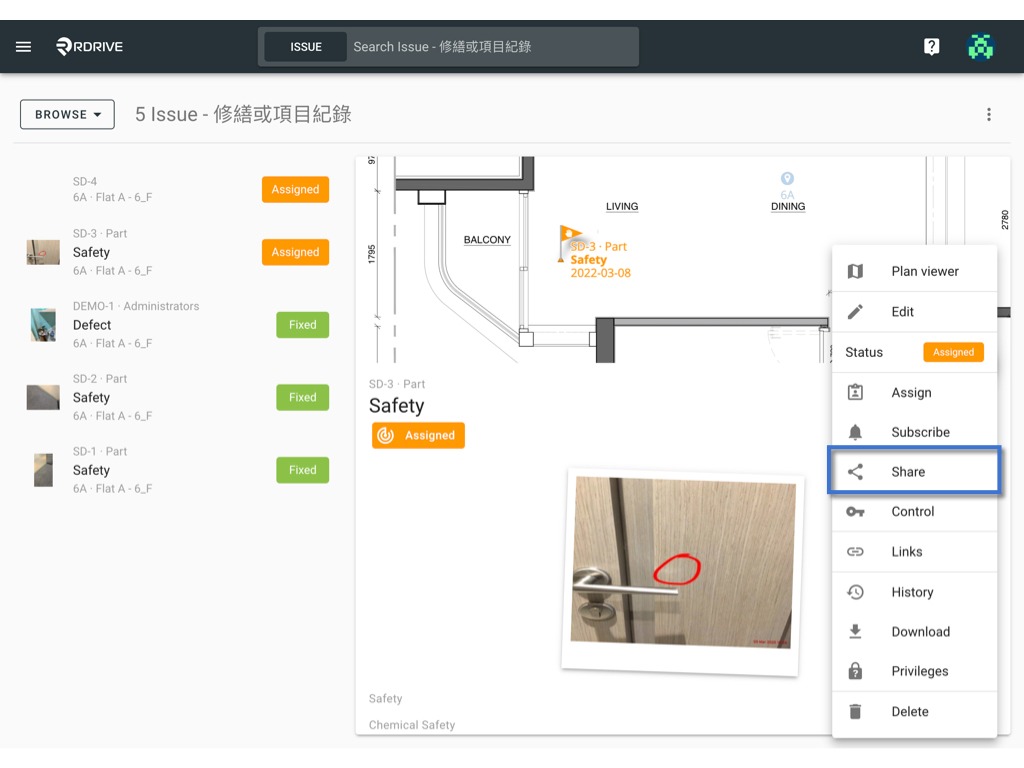
You will then need to select the Menu icon ≡ on the right-hand side of your screen as shown below and choose Share. Once selected, the share options for this issue/defect/record will be enlarged in a window on your screen.
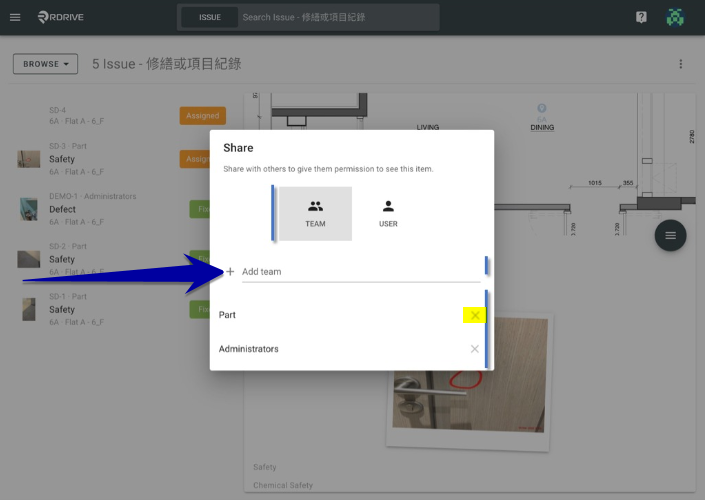
All participants that have been granted access will be listed within the window.
To add a participant, be that a Team or an Individual User, simply select which category is relevant (Team/User), press the + button as shown in the image below and enter the relevant details. Alternatively, to remove a Team or Individual User, you can press the x button highlighted below.
To save your participant add/remove request, you need only to click outside of the enlarged window.

Via Plan Viewer
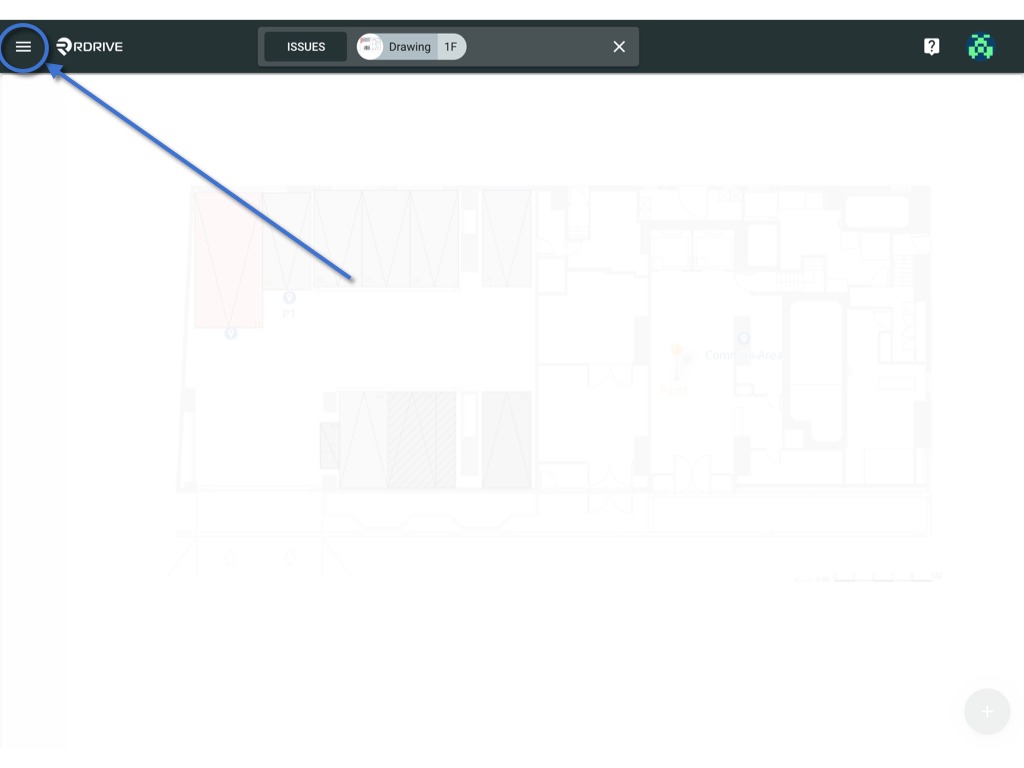
Press the Menu icon ≡ in the top left corner of your screen to unfold the Menu and to gain access to the Plan Viewer as shown below. Then select the desired drawing.

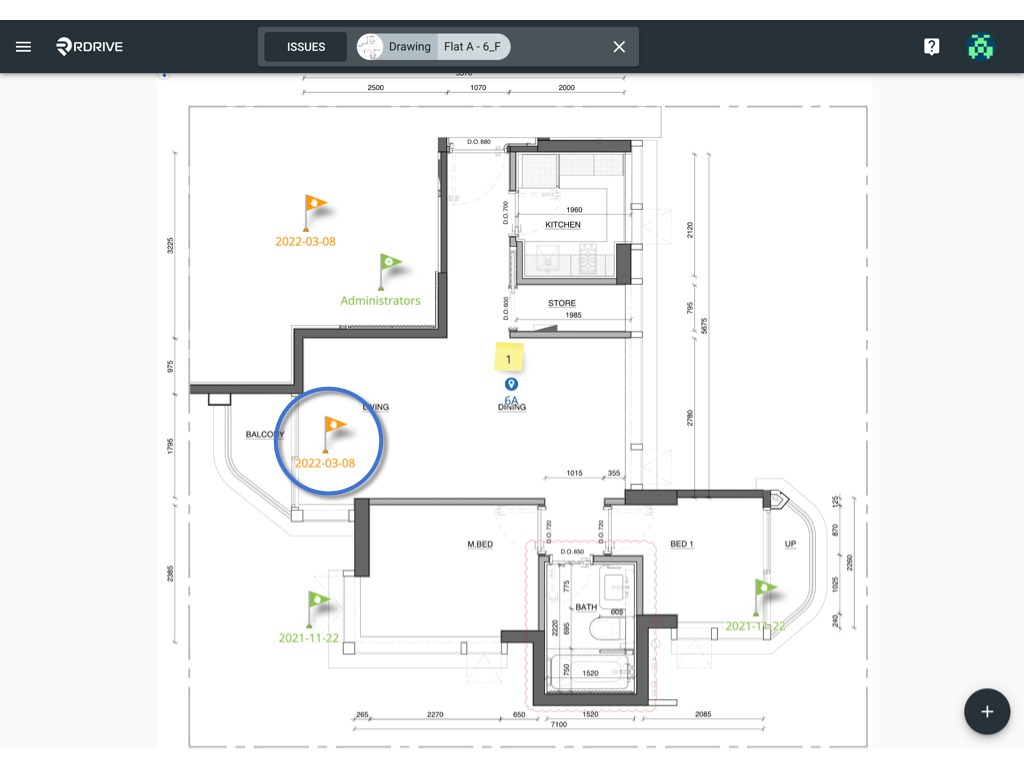
Click on the issue/defect/record pin, the details of which will display on the left-hand side. Then press the ⋮ Menu button in the top right-hand corner to unfold the Menu.
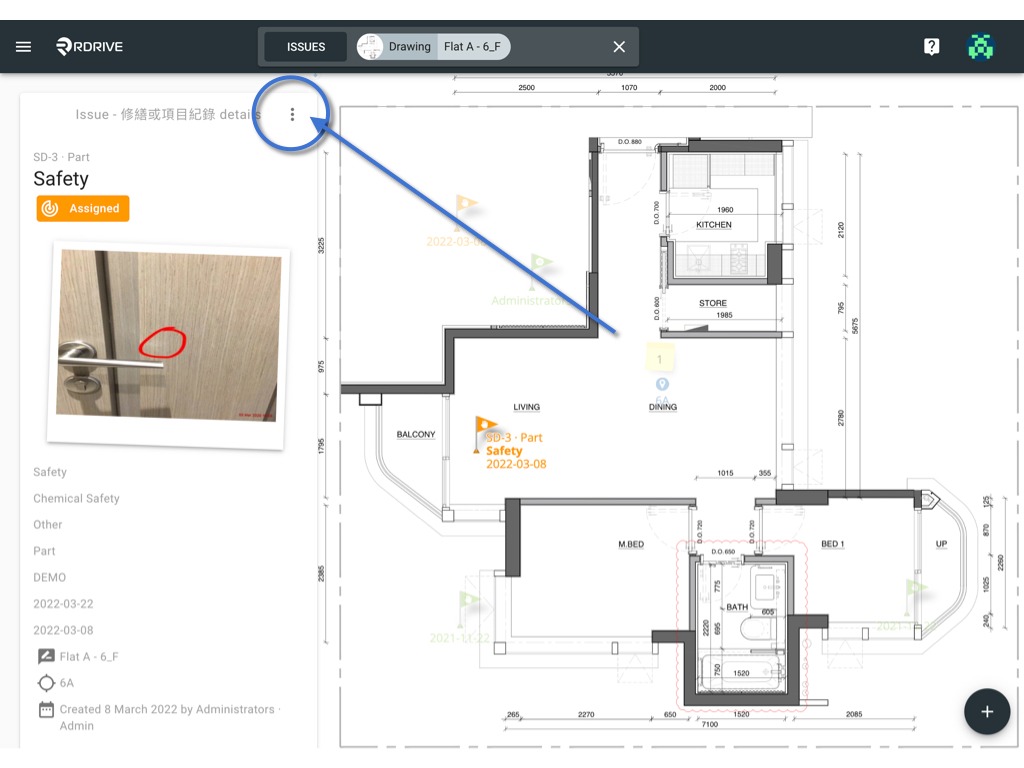
Select Share. Once selected, the share options for this issue/defect/record will be enlarged in a window on your screen.
All participants that have been granted access will be listed within the window.

To add a participant, be that a Team or an Individual User, simply select which category is relevant (Team/User), press the + button as shown in the image below and enter the relevant details. Alternatively, to remove a Team or Individual User, you can press the x button highlighted below.
To save your participant add/remove request, you need only to click outside of the enlarged window.


Was this article helpful?
That’s Great!
Thank you for your feedback
Sorry! We couldn't be helpful
Thank you for your feedback
Feedback sent
We appreciate your effort and will try to fix the article